Making of scale model
making of scale model
By Marín myftiu.
sharing the road
Sharing the road, is the theme for the 2007 michelín challenge design(TM) (mcd) (www.michelinchallengedesign.com), a year-long transportation design event that culminates at the north américan international auto show (january 13-21, 2007) at cobo center in downtown detroit. This year entrants - Over 260 of them from around the world - Addressed Cars and other light vehicles, semi trucks and passenger buses as well as road users on two whels and two fet.
Bob miron, michelin director of technical marketing, notes some of the design solutions selected by this year eight-member jury - An expert panel of renowned designers, transportation industry educators and safety experts - Addressed being dored.
The xv concept from Marín myftiu of albania features a locking system that prevents a dor from being opened for a few seconds After the vehicle is turned of when an object approaches within the dor span, said miron.
This tutorial covers how Marín myftiu modeled/created his entry.
car design technique, concept todo scale model.
Getting started.
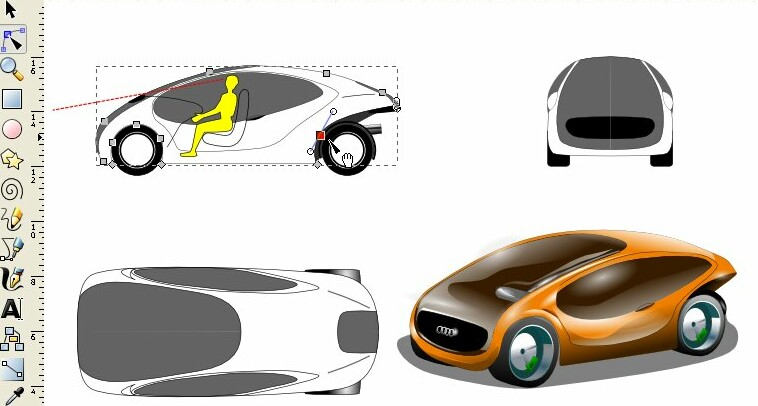
During this tutorial, y Will explain the whole process i have followed for designing a car. It Will not be a detailed, step by step method since it covers Many Fields beyond Blender or Even your own PC. This is an overview of the whole process, with ocasional focus on particular techniques. We Will start with the concept sketches and end up with a 1:6 espuma scale model.
Concept.
First of all it takes a lot of Thinking -> sketching ->rethinking -> re-sketching. Car modeling is the most frustrating thing i have sen in 3d modeling up to now and youve got todo have crystal clear ideas (or almost) of the ins and outs, solid and voids, bumps and depressions of that surface before you start of, most frequently, big mistakes found during 3d modeling Will require you todo redo most of the work, that may be whole weks. So first of all, do a lot of sketches and diferent views todo clarify as Many details as posible.
Blueprints.
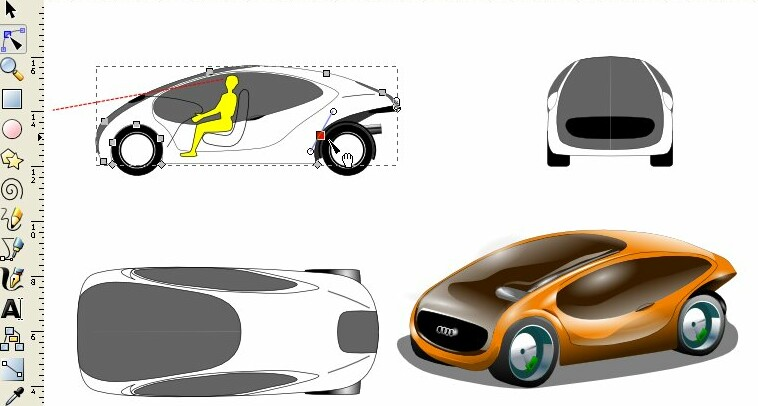
As you might have sen in car modeling tutoriales, it always takes blueprints of that particular car and the same is neded for your own concept. For some precise blueprints you can use freeware Vector software like Inkscape (like i did). Inkscape a los helped me go one step ahead of my sketches, making a colored illustration. When working on the blueprints, y would advise todo kep an existing car blueprints on the background todo kep the proportions in check.
Blendering.
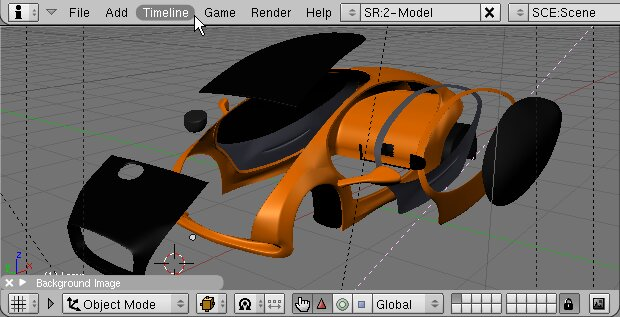
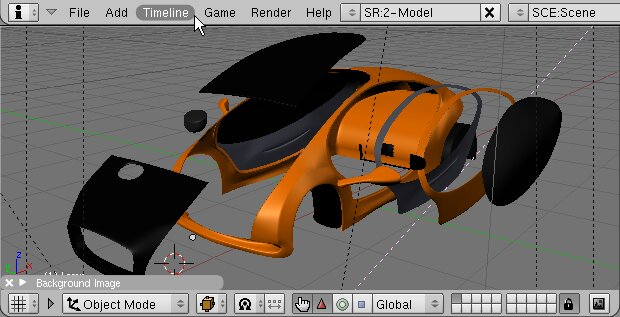
Well, assumed that we have done all the above correctly, its time todo warm up the Blender engines. I am on a 64bit AMD machine and 64 bit system so the x64 / se3 optimized build gives a lot of added rendering power (+75%) compared todo the standard. I Will not cover here, in detail, the whole modeling as it is a tutorial apart but, a few concepts are almost vital when turning your concept into a 3d:
Part subdivisión. Always subdivide your model body into distinct parts (dors, sides, cowling, mirrors etc). Attempting todo sepárate some parts After having done some modeling, by cutting or other methods, Will cost you a lot of time and eforts todo correct/adjust them.
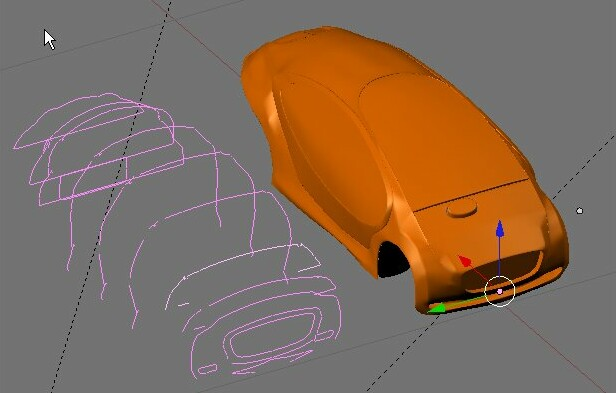
Grid resolution. The same is todo be said when you model the Polygons. The technique i have used is pretty straightforward, extrude a point following distinct curves on the background blueprint. Neighboring curves should have appróximately the same number of vértices todo form as Many regular, four vertex Faces as posible. You have todo set in mind the exact positioning of the main curves since any latter Cut or loop Cut may seriously damage the surface.
Correct lighting. Usually i use a traditional 3-lights Scheme and play with them todo get god lighting and since most often time is a concern so i dont include radiosity or Occlusion in test render.
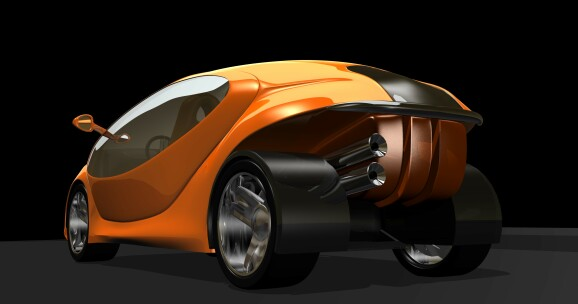
After all the work, the final render loked something like this:
Scale model.
When finished with the render and photo editing, it was the time todo start Thinking about the scale model. While i was not an expert with Blender, a scale model was something in which i had zero experience and all i had at my disposal were simple tools like a saw, shaping gauzes, scissors, rulers, a simple caliper and few other things.
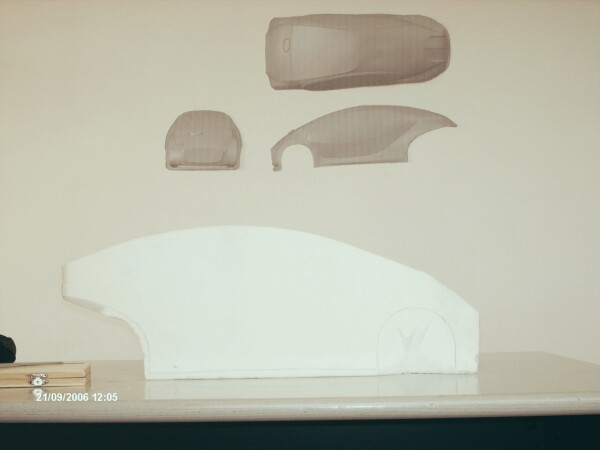
The first thing i did was todo print all the thre main views of the model in 1:6 scale (the models real scale). These images on the wall served throughout the modeling process as a 1:1 reference for most of the dimensions, you open the caliper according todo the part you want todo Measure and then compare it with the real dimension on the model, pretty straightforward.
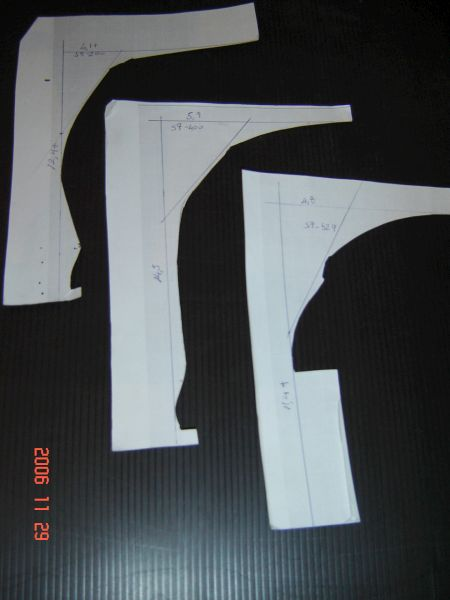
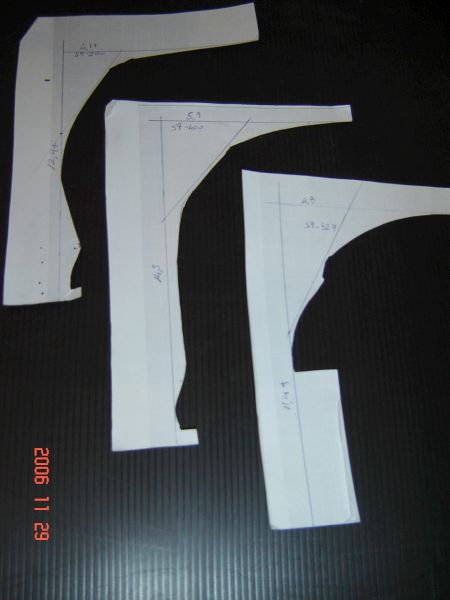
Another trik in which Blender helped me, was preparing cardboard templates of some given body sections. I subdivided the whole length of the xv in 12 sections and Cut the car body After those sections. After rendering each section Cutout, scaling them in the Gimp and then printing, we only have todo stick each section on a cardboard piece and carefully Cut the hollow part. After this operation, the only thing todo do remains Marking the sections on the working board according todo the distances of the sections we have in Blender, so we can place the right section at the right distance todo chek the work progress.
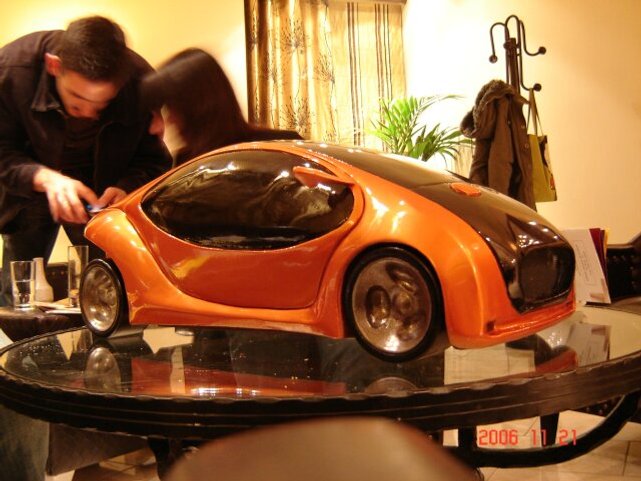
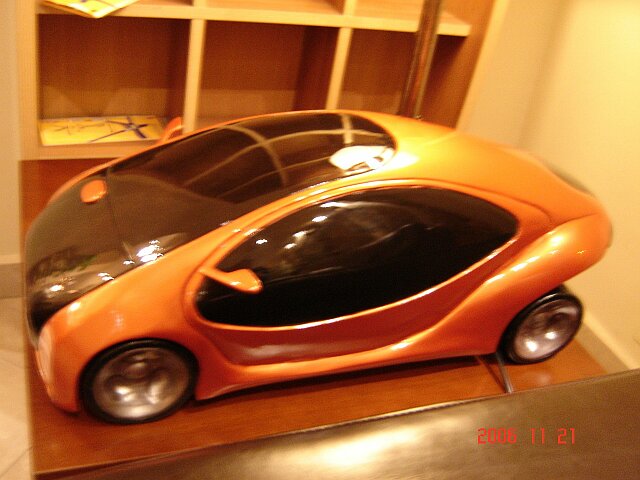
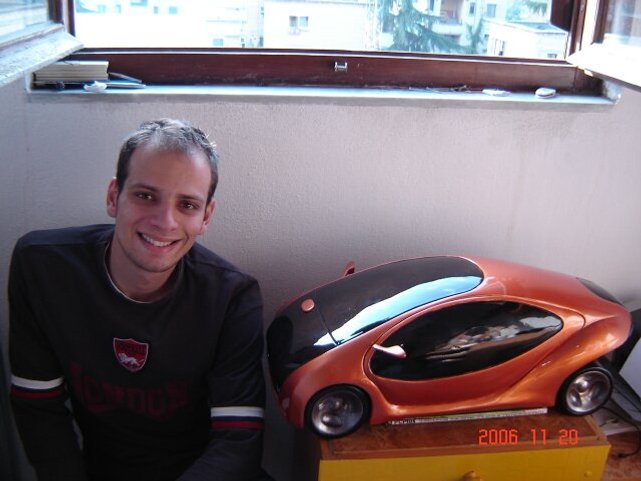
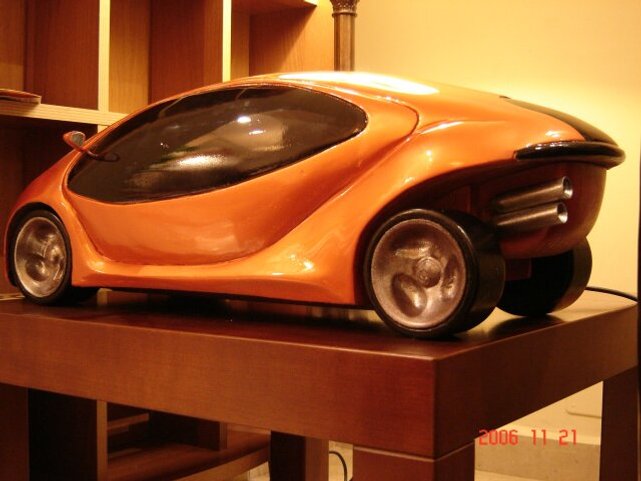
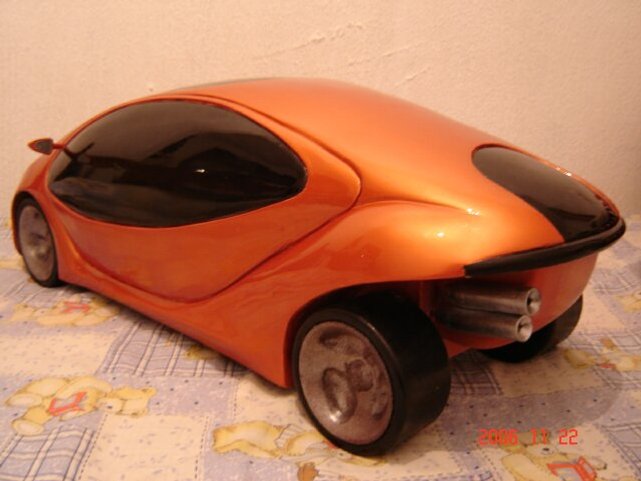
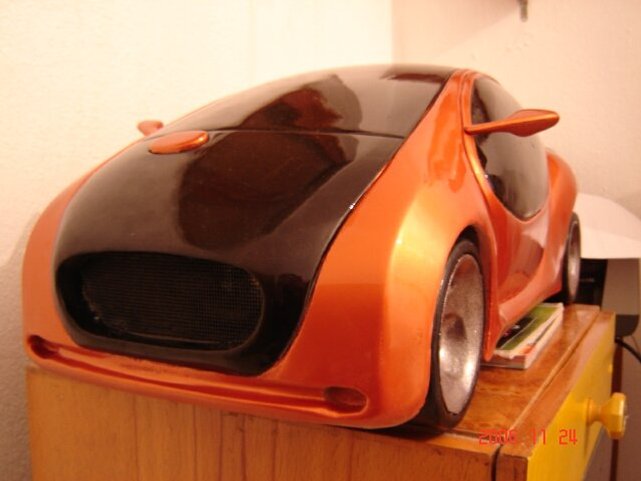
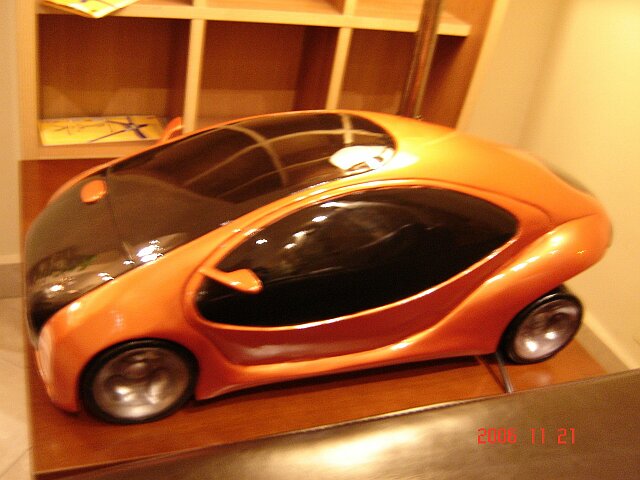
And this is the final output. This model Will be displayed by michelín on the north américan international auto show, in early january 2007. As you could se most of the process, Blender played a crucial role not only in modeling and rendering but a los in putting together a correct scale model and the result was pretty satisfactory.
Marin myftiu is from tirana, albania. He is currently studying architecture and working part time as graphics designer. He is working in architecture, product design, interior design projects and more importantly seking an carer in car design. www.frewebs.com/multid. www.blenderart.org.
-- IMÁGENES ADJUNTAS --




|Agradecer cuando alguien te ayuda es de ser agradecido|


 Citar
Citar