

taonui face modeling
By Wong hua.
Introduction.
There are a lot of methods for modeling a head. Some people like box-modeling, others prefer the more tedious approach of modeling the head polygon-to-polygon.
While at first, box-modeling appears easier, the problems appear when you start detailing the model. Adding loops todo the already existing box Mesh can be tricky and time consuming for less experienced modelers. Most of them end up with a face that is todo dense in poly count, yet less detailed and/or having Strange creases and various issues. A lot of the best modelers ive known so far prefer the polygon-topolygon approach.
Although it is a tedious method, it ofers greater control of the final Mesh topology than the box-modeling method.
Some very useful tools: loop subdivide, and proportional editing. Proportional editing is kind of emulating Sculpt but with lower res meshes, a must have for Organic Modeling. To use it, go into Edit Mode, press the o-key and mousewhel up or down todo change the Radius.
Having god referencias are really a plus. For this face (based on no photography), y used the marquardt beauty mask todo have a lot of attractive proportions.
You can find it here : http://www.beautyanalysis.com/mba_yo...emask_page.htm.
Take the frontal repose and the lateral repose for a neutral face. But enough talking. Let assume you have reached a point where you know the proportions of a human face and wish todo Solidify this knowledge into a realistic portrait.
I always start by doing the eyes. Eyes are the most recognizable and important part of a face. Some might start with another part of the face, but for me, if i screw up the eyes, y dont Even bother finishing the face anyway.
Edge extrusión Will be your work horse for new face creation, along with merging vertexes and loop subdivisión. Loop subdivisión is a nice tool todo have, because we essentially work on face loops.
Modeling the eye.
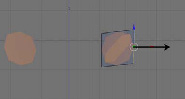
Step1 add a plane todo the 3d view. Before doing anything, add mirror then subdivisiones modifiers todo the Mesh.
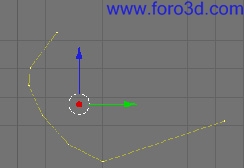
Fig 0. Starting out with a polygon.
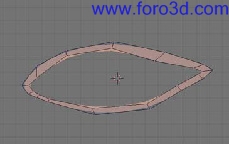
Start by extruding an Edge from your plane and do a rouge outline of an eye (fig 1).
Fig1. Modeling the outline.
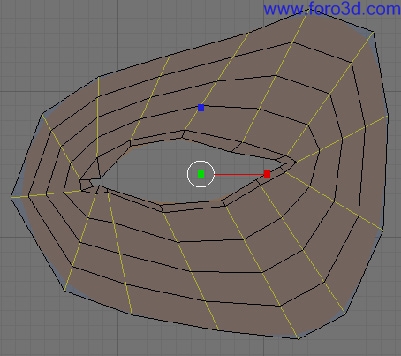
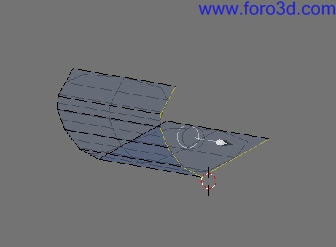
Step2 this Will serve as a basis for modeling the eyes. Select one Edge from the outer Rim while pressing [Alt+shift+d] and extrude the selection, scale it and move the vértices until you have a shape like in fig2.
Fig2. Extruding the outer Edges.
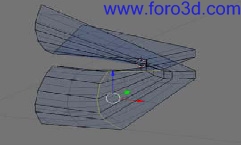
Step3 select the following Edges and subdivide them. I subdivided them 3 times (fig3b).
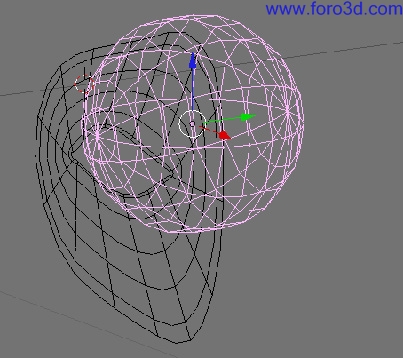
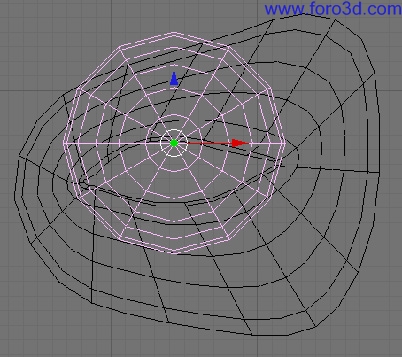
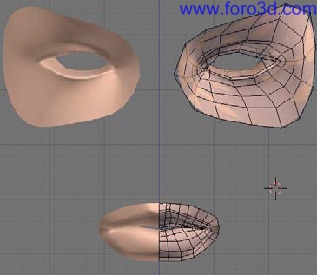
Step4 now is a god time todo add a sphere. It Will be a perfecto placeholder for the eyeballs. For the size, the sphere Radius is roughly the same than the eye width.
Fig3. Subdividing for detail.
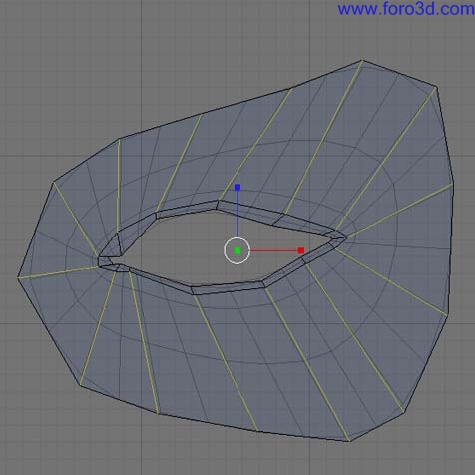
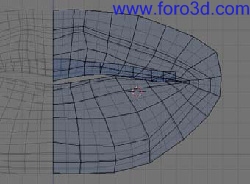
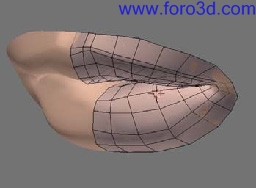
Step5 now is time todo shape the eye. Move the vértices in such a bien that the eyelid covers the sphere. Retopo can be put into god use here.
Fig4. Placing an eyeball.
However, note that the vertex moved with retopología Will be todo close todo the eye surface. So, you Will eventually have todo move them again After retopología.
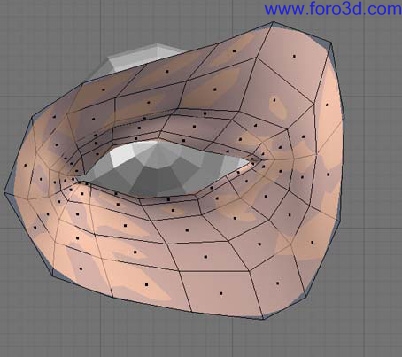
Now you should have something close todo this:
Fig5. Basic Mesh for the eye.
Now you have nice looking eyes we are done for now. Let move todo the mouth.
Modeling the mouth.
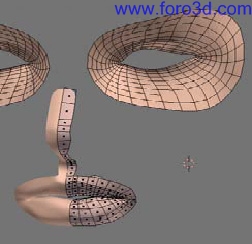
Step1 from the side view, add a plane, suppress all but one vertex, select this vertex and start extruding a profile like the one on eye modeling step1.
Once you have your profile, select the Edges and extrude them todo obtain something close todo fig6b.
Fig6. Obtaining basic lip shape.
Now that we have these basic lips, let put them in god shape. Loop subdivide the lower lips and start tweak the shape as in fig7.
Fig7. Tweaquíng the lip.
Continue subdividing and tweak todo obtain a shape like in the fig below.
Fig8. Lip shape progress.
Okay. Now we have decent lips, let get todo the no sé.
Right now, this is what we should have:
Modeling the no sé.
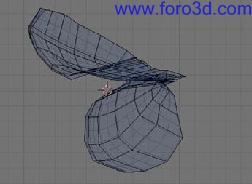
Step1 who knows where the no sé is? Start extruding the no sé from the upper lips, like this:
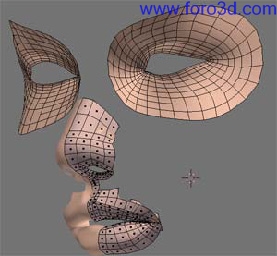
Images below show the no sé extruded from one Edge of the upper lips.
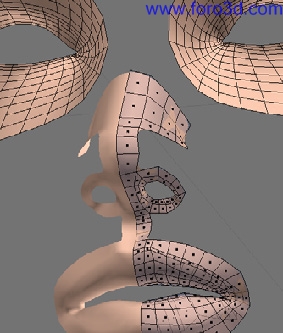
Use Edge extrusión todo create prominent no sé features (se the image next).
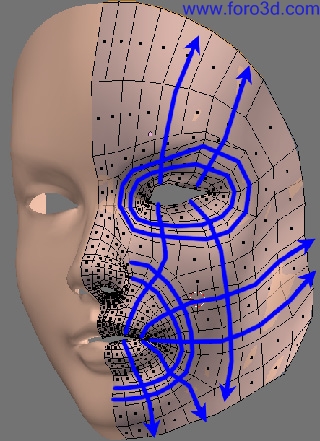
Now extend the facial features by following these guides as shown in fig12.
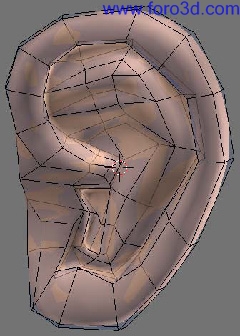
Modeling the ears.
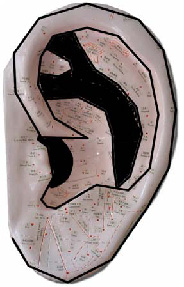
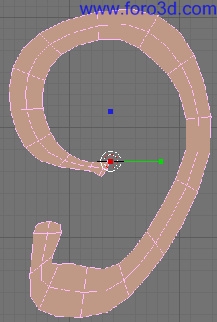
Step1 people often have trouble with ears. This tutorial doesnt pretend todo be right, but todo show obvious ear structure that you have todo include in order todo make your ear fel real. Once the mains structures have ben outlined, you se the ear is pretty basic. One big lobe and some kind of a y shaped bit of cartilage. Se the fig13 for reference.
Ear structures are underlined here and you can compare them with with ear reference in fig13a.
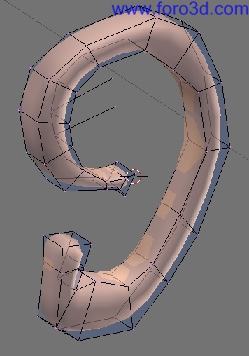
Step2 extrude the lobe you shaped in step 1 and start building the y shaped bit, se the fig14.
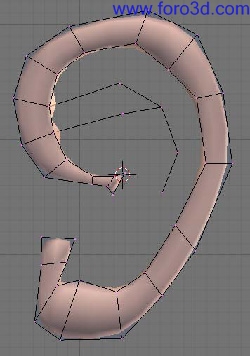
Step3 here is the next step. Start poly filling the ear. Note the y shaped thing, and the earhole (yes, the place where you fit you IPod earbuds).
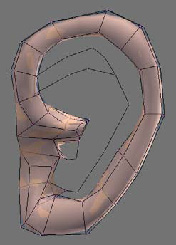
Step4 After a while you should have something like this:
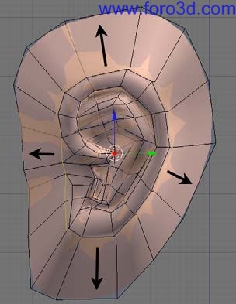
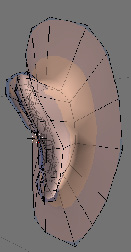
Step5 finish by extruding the outer Edge of the ear. Subdivide. From there we Will work up to the head.
Finishing the ear. When you are done, radiate from the ear todo model the rest of the head (face not included).
Finishing the head.
And voilá.
Now you have a face that is presenting desirable features like : relatively Low poly count but enough poly density where it is neded.
If you ned todo build a higher resolution Mesh, this face is easy todo modify and work with.
For the specific case of the extinction level event Project, a higher resolution face was required in order todo add finer facial features (Dixit Jeremy ray).
No sweat. Using multires and tweak with Sculpt tool, this is what you can do.
Notice that this Mesh has twice the poly count compared todo the previous head. But, due todo its correct topology, (i, e. - The right polys at the right places), reworking the Mesh with the Sculpt tool is a walk in the park.
Thanks for reading.
Blender news.
New Blender manual the essential Blender goes todo print.
The new Blender manual, the essential Blender, is now at the printers. Expect shipping todo begin no later than june 12th.
Essential Blender, the next book from the Blender foundation, is your oficial guide todo learning the fundamentals of this open and free 3d software suite. The book can be used as a step-by-step guide for people new todo Blender or new todo the latest changes in Blender. This book is the ideal Companion for the previous 2.3 Blender guide.
Essential Blender Will get you working with modeling, materiales and texturing, lighting, particle systems, several kinds of animation, and rendering. In addition, there are chapters on the new Mesh sculpting tools and the brilliant compositor. For users familiar with other 3d packages, there are sepárate índices that reference topics using your application terminology. If youve ben looking for a bien todo give yourself a solid fundación in the basic tools and techniques of Blender, essential Blender is there for you.
Order your copy today, sale prices end june 5th.
Blender 2.44
Blender 2.44 was intended todo be an upgrade release, mainly todo clear up bugs and ensure a clean stable versión before the big push todo 2.5, but the developers couldnt resist putting in at least a few interesting new features for us todo play with.
This versión now is fully 64-bits compatible, new cast and Smooth modifiers were added, a couple of composite nodes were added, and a revamp of the old Mesh primitives was done adding new parameters and options. But the most relevant addition todo Blender 2.44 is the new long-awaited, but unexpected feature: Subsurface Scattering (s) support.
Grab your free copy today. www.blenderart.org.
-- IMÁGENES ADJUNTAS --

×
 Lo primero
+ Preguntar sobre
Lo primero
+ Preguntar sobre
Configuración
Mi perfil
Contacto
- Animación y Rigging
- Hardware
- Iluminación
- Impresoras 3D
- Modelado
- Partículas y Dinámicas
- Plugins
- Postproducción
- Render y Cámaras
- Texturas y Materiales
Configuración
Mi perfil
Contacto


 Citar
Citar