

 Fun with texture nodes
fun with texture nodes
By Sandra gilbert.
Introduction one of the funnest things about a new Blender reléase is getting todo play with and test the new features. So i cleared up some free time for playing and sat down todo chek out our new texture node característica.
With the reléase of Blender 2.49, you can now create custom textures just like you can with materiales. Once created, these textures can be used just like regular textures. But since this is a new característica and i didnt pay any attention todo the last development cycle, it dawned on me that just because it loked like fun, it didnt mean that i knew how todo actually use texture nodes. So of todo the reléase notes where i found a very col sample that loked simple enough that i could replicate the effect.
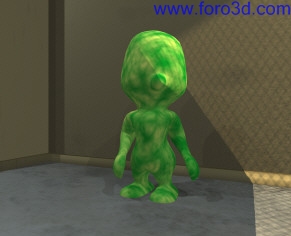
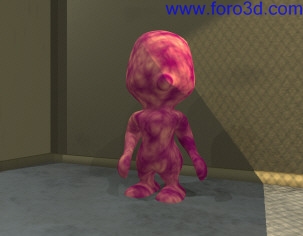
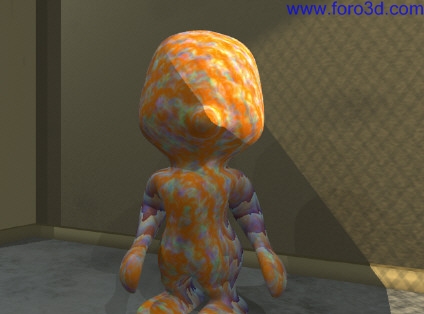
So here are my first attempts, which are all variations on the sample image:
I discovered that playing with texture nodes was pretty easy, especially if you are somewhat familiar with how material nodes work.
All you ned todo do is, with your object selected, create:
A new material.
A new texture.
In the texture buttons window there is a new button in the texture panel, nodes. If you click it, all the normal texture options disappear. Which is totally ok, because we are going todo create our textures in the Node Editor window where, happily enough, all of our favorite options are available.
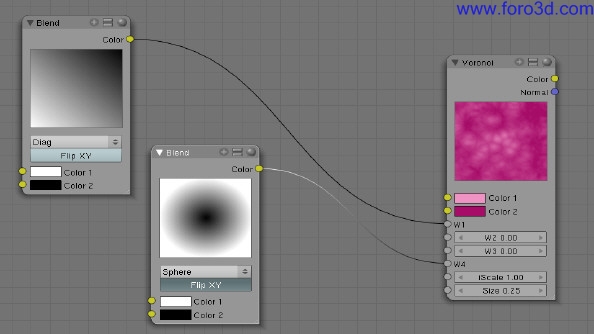
Switch todo the Node Editor. click on the new texture button (it is the spotted one) go ahead and deleete the default checker node panel.
- add 2 blend nodes.
Add>textures>blend.
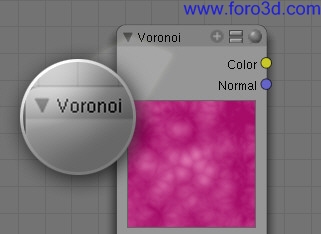
Add a voroni node.
Add>textures>voroni (se image below).
For the 1st blend choose:
Diagonal.
Color 1: white.
Color 2: black.
For the 2nd blend choose:
Sphere.
Color 1: white.
Color 2: black.
Connect the following:
- blend 1 (diagonal blend) todo w1 socket on the voroni node.
- blend 2 (sphere blend) todo w4 socket on voroni node.
- on the voroni node you can play with the other settings until you get a pattern that makes you happy.
- connect the voroni node color socket todo the output viewer color socket.
- there is a name box where you can give your new texture an unique name.
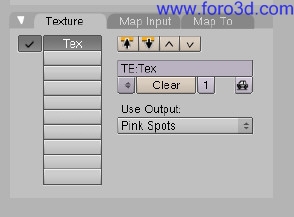
- ok the node texture is finished, so now let use it.
In the texture panel of the material buttons window, there is now a use output option with a drop down list of available node textures. Select the texture you just created.
Now you can use it just like any other texture. You can use them in texture channels, as part of material nodes, with particle systems and Even combine them with other textures.
And the fun part is you can go bak and change change colors, texture types and settings on the fly, as you ned or want, just like you can in material node setups.
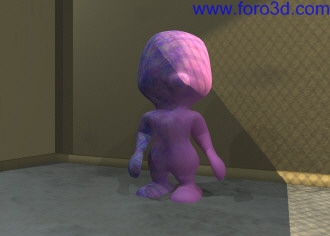
Now how col is thatí After i had gotten more comfortable with the texture nodes and my sample variations, y started playing a bit more and came up with a totally useless tiene dyed look that amused me todo no end.
By Sandra gilbert. www.blenderart.org.
×
 Lo primero
+ Preguntar sobre
Lo primero
+ Preguntar sobre
Configuración
Mi perfil
Contacto
Mail al administrador
- Animación y Rigging
- Errores de programa
- Hardware
- Iluminación
- Impresoras 3D
- Modelado
- Partículas y Dinámicas
- Plugins
- Postproducción
- Render y Cámaras
- Script
- Texturas y Materiales
- Videojuegos
Configuración
Mi perfil
Contacto
Mail al administrador

 Citar
Citar