Sunflow rendering system tutorial
sunflow rendering system tutorial
By Cristopher kulla.
introduction
In this tutorial, y Will present some of the basic features of sunflow and how todo use it from Blender.
Sunflow is my open source rendering system. It is built around a small but very flexible Core which allows it todo be completely customized. It contains several modern algorithms that make it a god candidate for generating realistic images. It has ben recently connected todo Blender vía a simple export script which i Will be describing.
installation
Sunflow is written in java. This means you Will ned todo download and install the Sun jre (or jdk) if you dont have it already. Go todo http://java, Sun.com/ and follow the instructions for your particular operating system (OS X users Will ned todo go todo the Apple website). Sunflow requires java versión 5 (sometimes called 1.5) or higher.
Once you are setup, go todo a command Prompt and type:
Java -versión.
If the correct versión number appears everything is setup correctly.
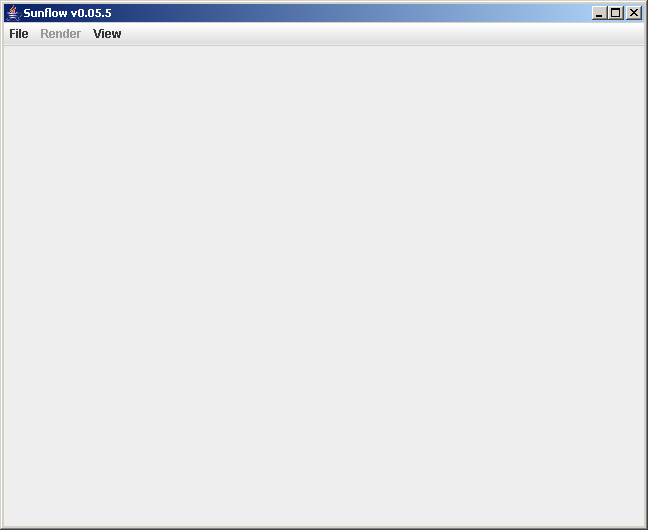
Next get the binary reléase from the sunflow website (v0.05.5 at the time of this writing) and unzip it todo a directory of your choice. Go todo that directory in command line mode and type the command line described in the readme file included in the distribution. You should se the following window appear:
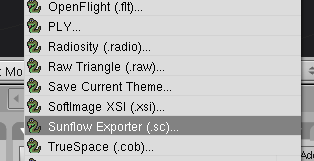
Finally, get the Blender exporter script from the sunflow website and install it todo your Blender scripts folder. When you start Blender you should se an option appear in the file->export menú as follows:
You are now ready todo render your first image.
first render: Ambient Occlusion.
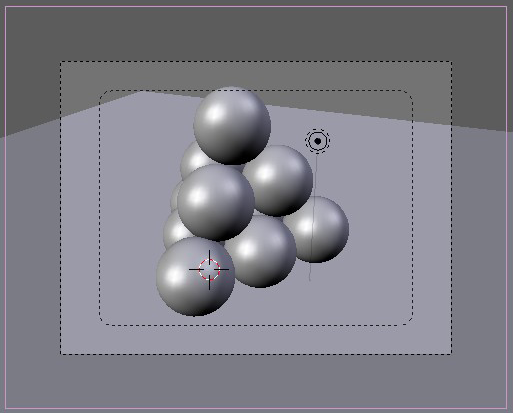
I prepared a very simple scene here for illustration purposes. Fel free todo follow along with your own favorite model. Here is what my scene looks like in the 3d view:
Go todo the file -> export and pik the sunflow exporter you just installed. It Will bring up the following UI in the script window:
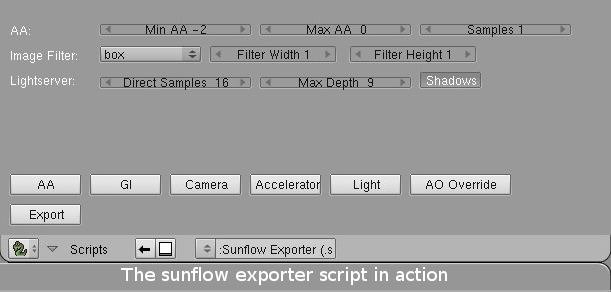
We are just going todo change a few settings the first time around. Our goal is todo do a simple Ambient Occlusion render todo get a fel for the process. Dont worry about the Many diferent settings you se, we Will cover most of them son.
In the AO override tab, Simply click the AMB OCC toggle. This is Simply telling the exporter that we want todo override all Shading in the scene with the prescribed Ambient Occlusion shader.
The most important options are samples (number of rays traced todo calculate the Occlusion) and the distance setting (how far todo look for other objects).
For now, leave the number of samples as it is, and set the distance todo a reasonable value for your scene. The default of zero corresponds todo infinitely long rays.
Now just hit the export button and pik a location todo put the exported scene file. You can look at Blender output window todo se the steps the exporter is taquíng. It may take a few seconds todo walk th rouge your scene if you have Many objects. When the file is exported you Will be sent bak todo the exporter options.
Now go todo the sunflow window you launched earlier and open the scene file you just wrote out. If loading succeds without errors, the render menú option Will now be enabled.
Select render -> IPR first. The image Will start rendering in a very blocky form and progressively refine itself. After just a few seconds, you should already se what the final image is going todo be like. You may cancel the render at anytime. In most cases, less than 10% of the image is neded before you are ready todo launch the full resolution render.
Now select render -> render. The image Will render in small buckets this time. If you have a multi-processor machine you Will se several buckets rendering at once. After a few seconds you should se something like this:
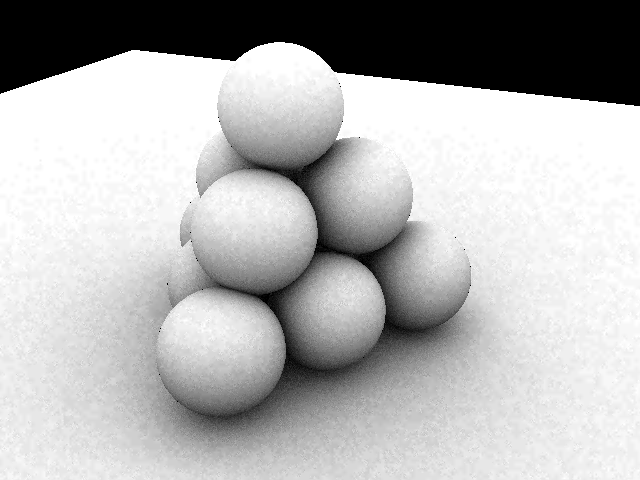
Congratulations. You just rendered your first image with sunflow.
Your image Will probably be noisy and have Many small artefactos. Dont worry. We Will learn how todo enhance the quality of the image son.
Now, let make our scene a bit more interesting by adding some lights and materiales todo it.
lights and materiales.
Go bak todo Blender and assing some unique materiales todo each surface. Kep in mind that the exporter does not yet support the whole range of Blender Shaders and textures.
For now, we Will just be creating regular Diffuse materiales. For each material, Simply assing a unique color. This is the only attribute that is read by default, all other options are ignored. There are a few exceptions todo this rule todo generate other sunflow Shaders, but we Will cover them later on.
Next, we ned some lights. The exporter currently only supports lamps and square área lights. Área lights Will give you nice software shadows at the expensé of additional render time.
My scene with basic Shaders and lights now looks like this:
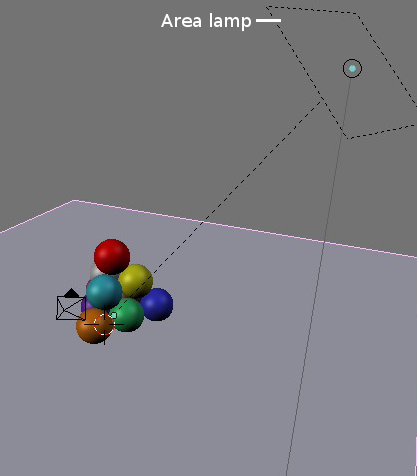
Once you are happy with your scene, time todo export again. This time, let try todo understand the various settings and how they affect image quality.
The most important are probably the a settings. The min and max values control how much computation goes into each píxel. Negative values mean computations Will be interpolated across several píxeles, positive values mean more calculations Will be done per píxel. Zero means a single computation is done per píxel. For example: the default values of -2 and 0 mean that the renderer Will start by calculating every 4th píxel, and adaptively calculate down todo the single píxel level where it is neded. This time, try setting your a values todo 0 and 2. Each píxel Will now be shaded at least once, and up to 16 times (level 2).
If we calculate more than one value per píxel, we Will ned todo average them together. The bien this is done is controlled by the image filter setting. Let pik the Mitchell filter as it provides a nice sharpening of the image. This particular filter has a fixed width and height, so those settings Will disappear from the dialog when it is selected.
Light server settings let you control how Many rays are used per light. The default of 16 is a bit high but usually gives god quality.
The GI tab controls global illumination. This is an advanced topic we Will explore in the next section. Leave all the controls at their default values for now.
The accelerator tab contains settings which have no impact on image quality but can make drastic diferences in image calculation time. The default accelerator is the kdtre and is usually the best choice. You can experiment with diferent accelerator types and se which one provides the fastest results for your scene. You can a los adjust the bucket order in this tab. Switch todo spiral this time todo have the image computed from the center out.
Under the light tab, we have the option of adjusting the strength of all lights in the scene. Since sunflow uses more physically based calculations than Blender, the light Powers Will not usually match. This global scale factor can help you compensate for this. I set mine todo 5, but this Will vary from scene todo scene. Note that the scale factor only afects área lights.
Finally, remember todo deselect the AMB OCC button from the AO override tab if it was still selected from the previous export.
We can now export and render again. If you export todo the same location as before (overwriting the old file), you can Simply use the file -> re-open menú option in the sunflow GUI todo quickly reload your scene.
Use the IPR característica again todo se what your scene looks like quickly. You Will probably ned a couple of export Cycles before you get the light intensities just right. Here is my result:
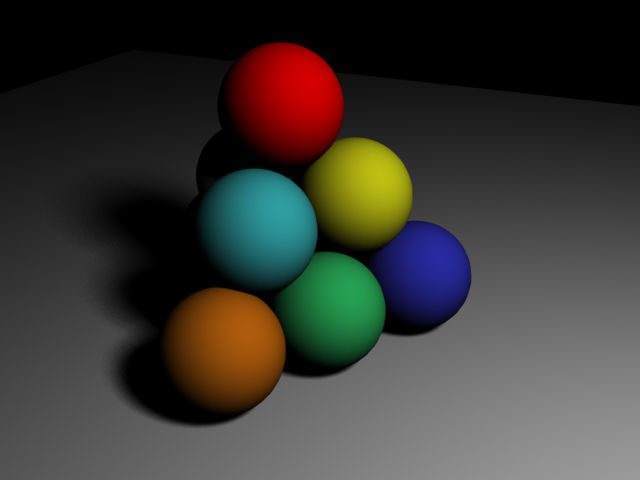
Despite the software shadows, this image isnt very realistic yet. I Will show you how todo address this in the next section.
global illumination techniques.
Global illumination refers todo physically based methods of computing lighting by taquíng into account the bien light bounces of surfaces.
As i mentioned in the introduction, sunflow is a very customizable renderer. It is therefore able todo incorpórate Many diferent GI algorithms into one coherent framework. This gives the artists diferent ways todo achieve their goals and makes it posible for developers todo introduce new algorithms, without breaquíng older scenes.
I Will now briefly describe one of the methods of calculating global illumination: Path tracing. This is the most accurate and easiest method todo learn. The catch is that it can take quite long todo achieve high quality results.
In the exporter, go todo the GI tab and enable the Path button. The algorithm is controlled by two parameters: samples and bounces. The first default todo 32 and controls the quality of the result. The second default todo 1 and controls how Many bounces the light is allowed todo make.
Leave the values at their defaults for now todo se their effect. Since this algorithm Will produce very noisy results, go todo the a tab and set both the min and max todo 0. This Will force only one sample todo be taken per píxel, which avoids the antialiasing from being forced todo super sample every single píxel because of the noise.
You may a los want todo set the filter bak todo box (width and height 1) todo avoid introducing artefactos by filtering the noise.
Export and render again. I added some Walls behind my scene todo se the effect of the bounces. Compare these two renders with and without global illumination:
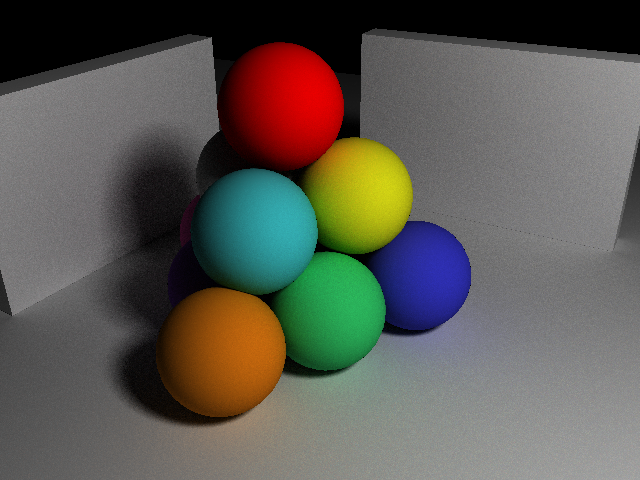
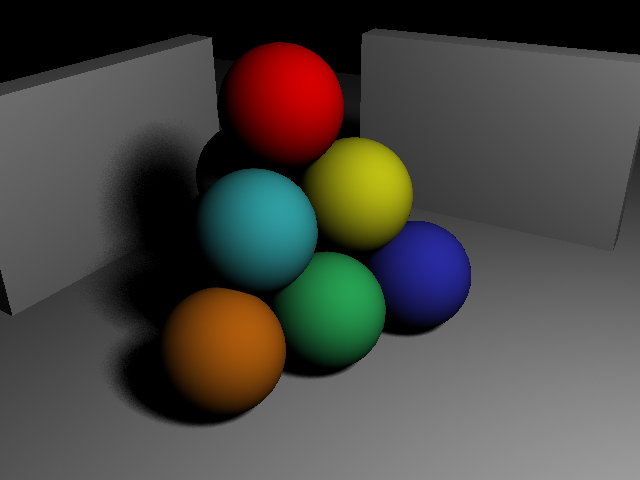
Notice how the shadowed Regions are no longer completely dark and how we obtained some subtle color bleding on the flor and between the objects.
You may find it hard todo get rid of the noise in the image in a reasonable amount of time, Even if you make the number of samples quite high. This is a theoretical limitation of the Path tracing algorithm. Photon Maps and irradiance caching are two algorithms that when combined can yield a much more eficient solution, however they are much trickier todo setup, Even for experienced users.
Rather than go into the details of these advanced methods, it might be better todo know that simpler and more eficient algorithms exist that Will very likely appear in sunflow son.
image based lighting.
In this section we Will cover the use of HDRI environment maps for lighting. Bak in your Blender scene, load in a longitude-Latitude HDRI environment map as a texture at the world level. Be sure todo unchek relative paths when loading the map. Rename the texture object todo ibllight as shown. This lets the exporter know you want todo treat this map as an environment light source.

Go ahead and hide all the lights you were using before (the exporter respects Blender layers), and make sure your scene is open. This type of lighting assumes the light is coming from infinitely far away, so its best suited todo outdor render. Indor scenes Will Perform very porly with this technique.
Sunflow appróximates the environment map with a fixed number of directional lights. This is controlled by the direct samples setting in the exporter. Using the default of 16 you Will probably se some Sharp Edges todo the shadows from the individual lights used. Simply increase the number of light samples until the Sharp shadow boundaries are decreased todo an acceptable level.
Exporting and rendering again, you should end up with something like this:
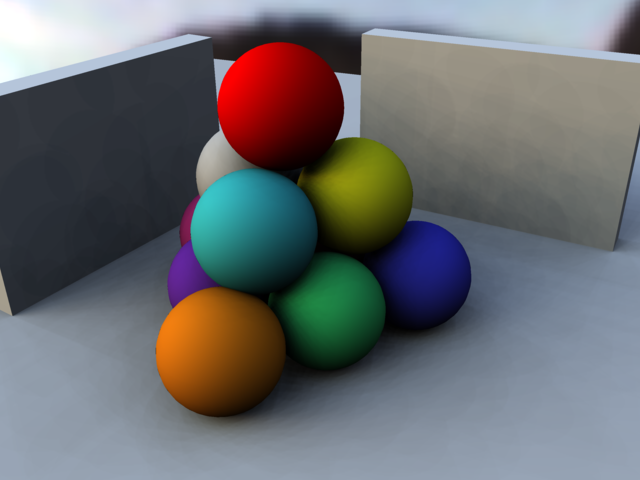
This image is quite realistic, Even though we have not used any global illumination. Of course you may enable Path tracing as we did before todo simulate the extra bounces of light.
Glossy materiales.
Finally, let make our Shaders a Little more interesting. Up until now we have used completely Diffuse Shaders.
Let start with the Shiny shader. It Simply adds a Thin reflection Coat on top of the Diffuse color. Rename one of your object materiales so that its name starts with sfshiny. The exporter Will now read the raymirr attribute todo determine the amount of reflection todo apply.
Next is the Phong Shader which provides blur reflections. Rename the material you wish todo edit so that it starts with sfphong. The Specular color now controls the amount of reflection while the hard value controls the blurriness. Higher hardness values result in sharper reflections. For my scene i used values ranging from 5 todo 50.
Now that we have added several layers of reflections, we ned todo pay attention todo the max depth setting in the exporter dialog. This controls how Many levels of reflections are allowed. The default of 9 is rather high so we Will reduce it todo 3 this time.
Here is the final result, rendered with the image based lighting from the previous section:
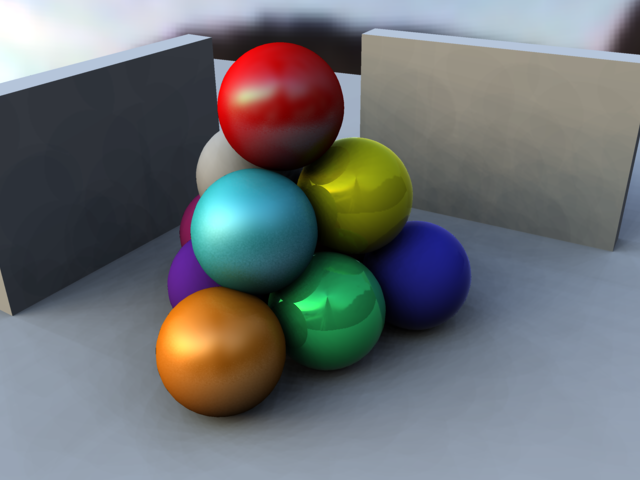
conclusion.
I hope youve enjoyed this quik tour of some the features of the sunflow rendering system.
One tutorial is not enough todo cover everything that is posible with this software. Many more things are supported, like textures, refractions, Depth of Field, Caustics, and Even procedural Shading. Pléase visit the sunflow homepage (http://sunflow.sourceforge, net) and the elysiun forums (http://www.elysiun.com/) todo learn more. Happy rendering.
By.
Cristopher kulla is the primary developer of the sunflow rendering system. In his day job he works as a software developer for reel FX creative Studios in dallás, Texas, working on commercials, direct-to-DVD and animated característica film projects.
.
|Agradecer cuando alguien te ayuda es de ser agradecido|


 Citar
Citar