

 Making of: the scene of a dream
making of: the scene of a dream
By Enrique González.
It all started as most projects do, as a simple idea. What i did not realice is that it was not simple. Camera angles, lighting, main characters, background characters, animated props, non-animated props, textures, materiales, the list went on and on. What was, and is, in my opinión one of the largest user-based movie projects todo ever start, the crosswalk. I am going todo walk you th rouge the start of the Project and show you just how we did what we did so far in creating this huge scene. This article is going todo show you some of the Many techniques developed for the movie. More precisely, y Will be focusing on the building of the scene.
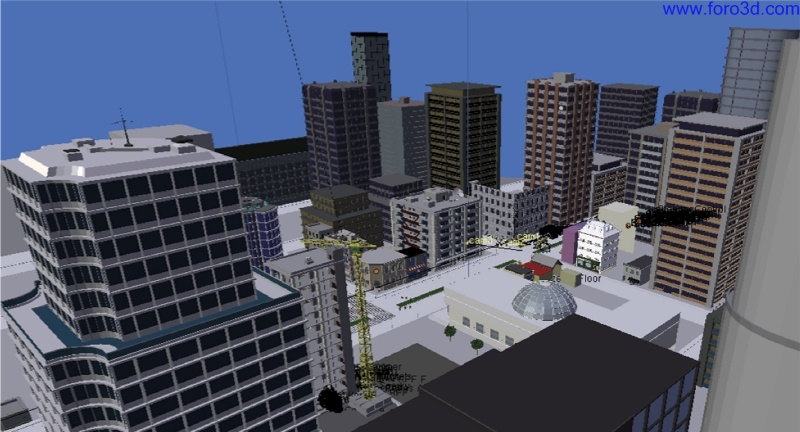
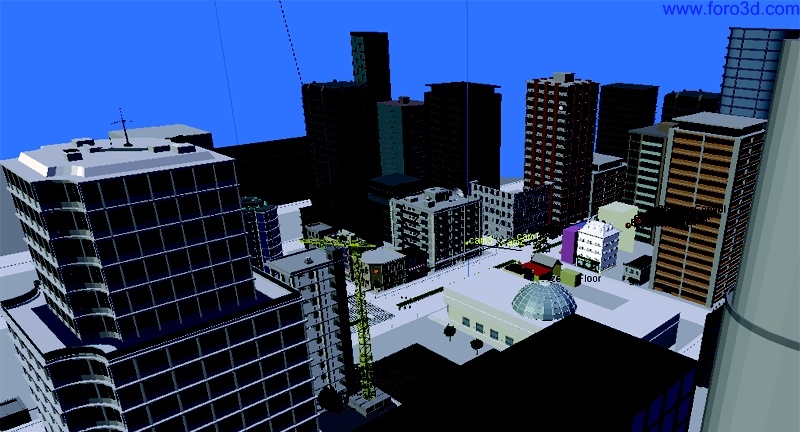
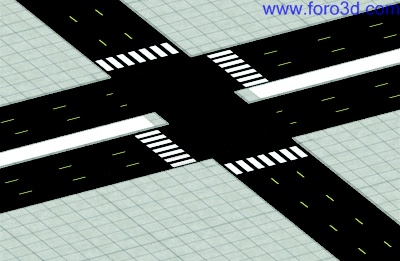
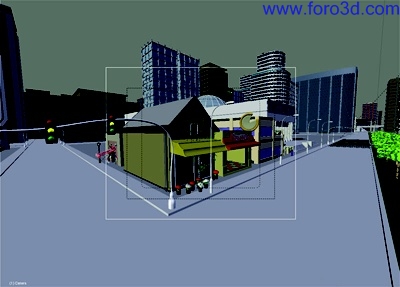
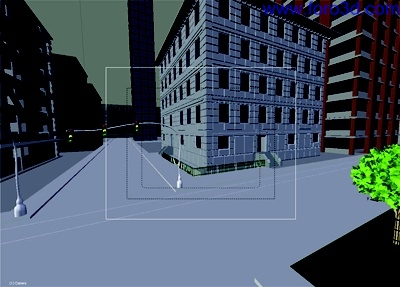
The most updated set for the crosswalk.
When we started working on the base scene (we named it basescene, since it was going todo be the base that all the other scenes Will be made out of), we started on an extrude and extrude again type of building method for the strets. Once i got todo the texturing part i learned very fast that this was not going todo work. Here is a very early extrude method example. It loked ok but it was taquíng me todo long todo texture it.
modular design
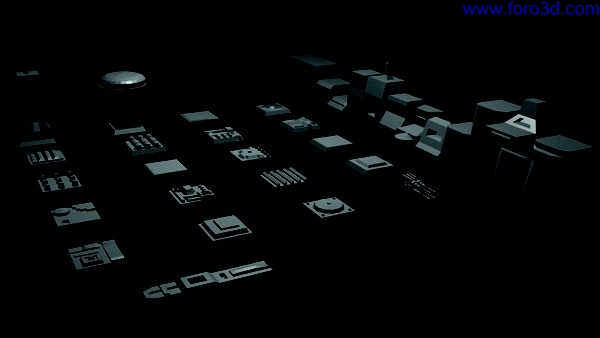
I then remembered an old scene i did for a Star Wars Project years back. I was building a death Star scene at the time. I loked at how they built the models for the original movies before they had CG. I was amazed at the simple approach they tok. What they did was build a few dozen diferent molds of panels for the deathstar and cast hundreds of the same ones and just assorted them in a bien so as you take a quik look it sems all random and complex.
This example shows how i made all the diferent panels.
Here you can se them all duplicated and set in random spots todo create a very complex look by using a very simple technique.
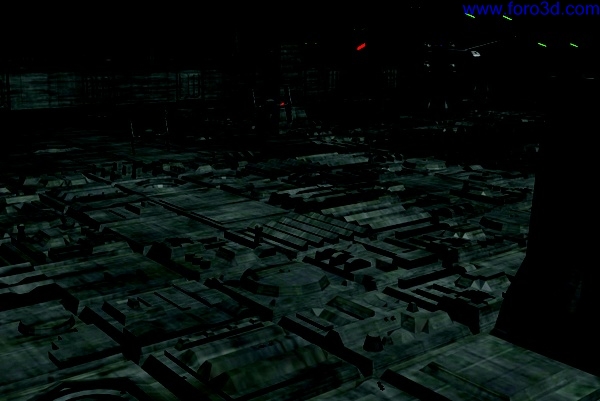
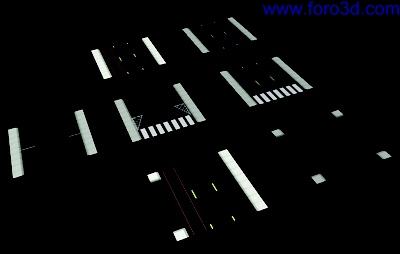
I tok the same approach todo the strets in the crosswalk.
And here is the final result of duplicating the same tiles over and over.
This Cut down the texturing time and made creating a whole city very simple.
2d todo 3d
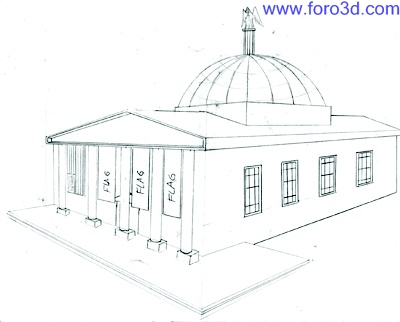
There was a lot of 2d work done before we started working in 3d. So much that i can only show you a few examples of what we started with. The museum and the cofe shop were the main focus of the movie so they were done first.
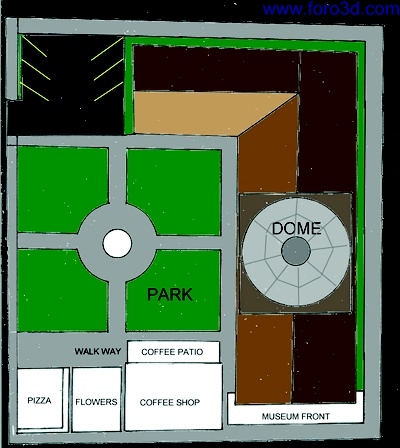
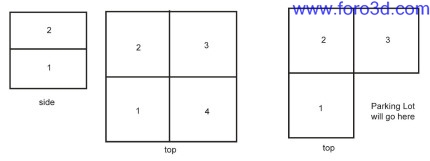
Here is a very early Layout map i did todo get the idea across all the people that started contributing todo the Project. It was very crude and i dont think it helped todo show them how big each building had todo be.
This map was the second versión we came up with. It intended todo show what was going todo be where. After chatting with all the new members of this Project we figured we would ned more than what was just in front of the Camera. The Camera Will se as far as it can so all those spots and holes neded todo be filled. This is where it became complex. From a director point of view, y tried todo visualice what should or should not be in each Camera shot. So i came up with this first draft and we started from here.
Cuts and tests
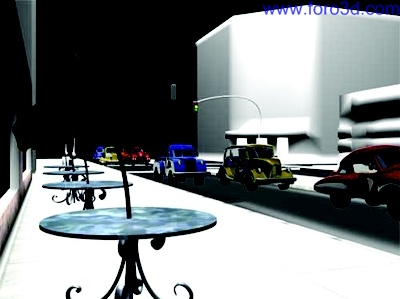
I learned that you have todo make tough choices sometimes. This was the first animated test we did using the new Cars and tables for the cofe shop. These scenes were todo be the final ones for the movie before i decided todo kill them and start over. At this point we had the Cars a few light poles and the estop light.
Animation enlaces at the end of this article.
The graphic artista (deadknight) who did the table and estop light has had a huge influence todo the overall style of the film. After i saw them and the table, y.
Was so blown away by the look of them that we changed the entire look. First 3d animation test.
The same goes for the designer of the Cars (sketchy). Once i saw the look of them i knew we had something. Still, it was hard todo deleete what i had made and spent time on, but in the end it was a decisión i do not regret.
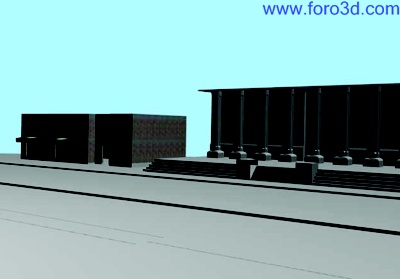
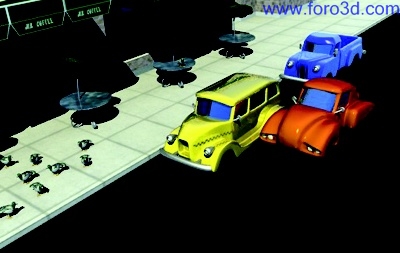
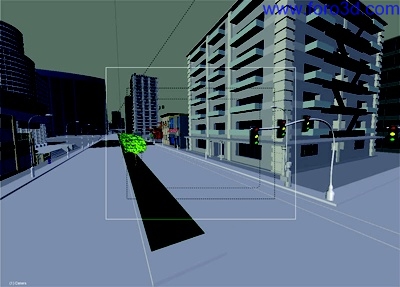
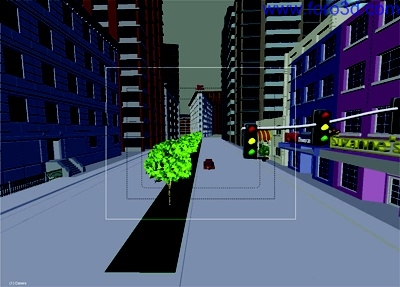
This was a very early stage lighting test done with a few of the models we had in hand. In this quik render, the pigeons make their world Premiere. These Will later be animated by roubal with múltiple types of actions like walk, peck, and fly.
Early lighting test.
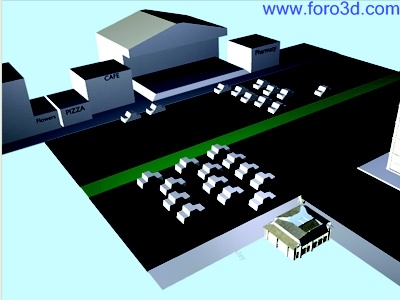
At first we had no idea how wide or Thin the strets should be. We knew we wanted todo have the appearance of a wide and busy Street. After we started playing with Henrys walking times we figured out that 3 lanes was as fast as he could walk. This test scene was a los scrapped After we went with the modular Street design.
Early 3d Layout.
Scale and Rig
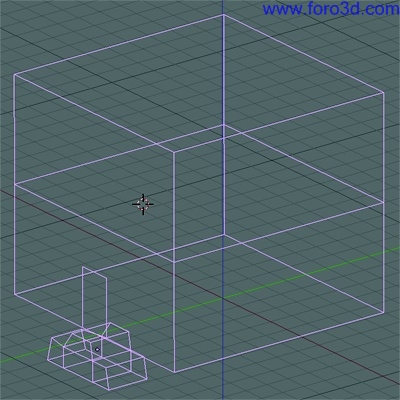
Once we started getting dozens of models from the community, y started todo append them all into one file. This is where i realiced something. I had buildings that just did not match. The scale was of on all of them. Even rescaling did not fix this problem. Also, how do i tell someone who is making a large building todo kep in on scale and make it fit in the city block that is designated for ití well i came up with a very small file called scalerig, blend. It was a Cube that could be used todo determine the height of a building and the scale of the Doors and Windows.
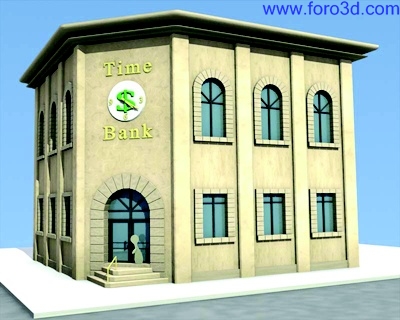
The idea was so simple everyone caught on todo the idea. I could call for a bank in the form of a 2x2x2. So the model Maker would download the scale Rig and duplicate it into 4 pieces and use both 1st and 2nd flors. As long as his building stayed in the Bound of the Rig he was ok. He was free todo build as he saw fit with Little direction on what could go where. Sometimes i would let them know if it was a corner or Street facing building. This would determine where the dor would go. With this method we could come up with all kinds of buildings.
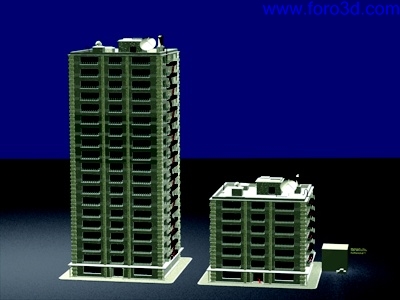
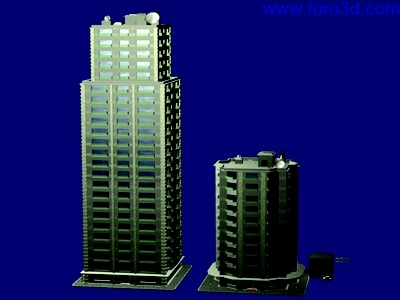
Top left: this one was done by lucid_monkey. This is a very god example of the first models we got After we went todo the scale Rig system.
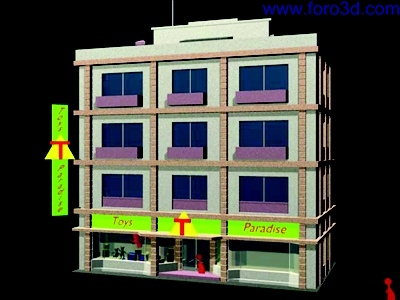
Top right: i forget who sent this one in - Maybe Andy. It was a very detailed building. You could Even se the Little.
Toys in the window.
Botom left and right: roubal did an awesome job using the scale Rig in making some truly amazing Sky scrapers. If you look on the bottom, you can se the scale rig.
Puting it all together
Now that we have all the models and we know where they are going todo be placed, its time todo start putting the scene together. All of the closer buildings were made at a higher poly count than the rear ones. These Will be in the Camera more so we wanted todo make them more detailed. I tok shots from all angles so you can se we tried todo fill all the gaps so it appears the city goes on forever. We a los have plans todo add in textured buildings in the far of todo further give the appearance of a large city.
I hope this was an informative article on how we did some of the things for this movie Project. I could write an entire book on the things i learned during the making of this film. Most of which are documented in the wiki. Links below.
Enrique González.
Enriq766 aquí enriqolonius.
enriq766@yahoo.com
www.blenderprojectsorg
http://wiki.blender.org/index.php/tu...3dmovies/index
http://www.youtube.com/blenderprojects.
www.blenderart.org.
×
 Lo primero
+ Preguntar sobre
Lo primero
+ Preguntar sobre
Configuración
Mi perfil
Contacto
Mail al administrador
- Animación y Rigging
- Errores de programa
- Hardware
- Iluminación
- Impresoras 3D
- Modelado
- Partículas y Dinámicas
- Plugins
- Postproducción
- Render y Cámaras
- Script
- Texturas y Materiales
- Videojuegos
Configuración
Mi perfil
Contacto
Mail al administrador


 Citar
Citar