

Making lightsabers. By Tyson benard.
Lets face it, everyone loves lightsabers. Glowing beams that can Cut th rouge nearly anything. Many people have wanted todo make these in Blender, hence the usual methods of using halos and the lightsaber script. Many Blender users want the look that others are achieving with the common programa Adobe After Effects, but couldnt come todo grips with Blender composite nodes and dont have the cash todo Forqué out on After Effects. Hopefully this tutorial Will solver that problem by giving you a method for making lightsabers of profesional quality inside Blender.
Getting started:
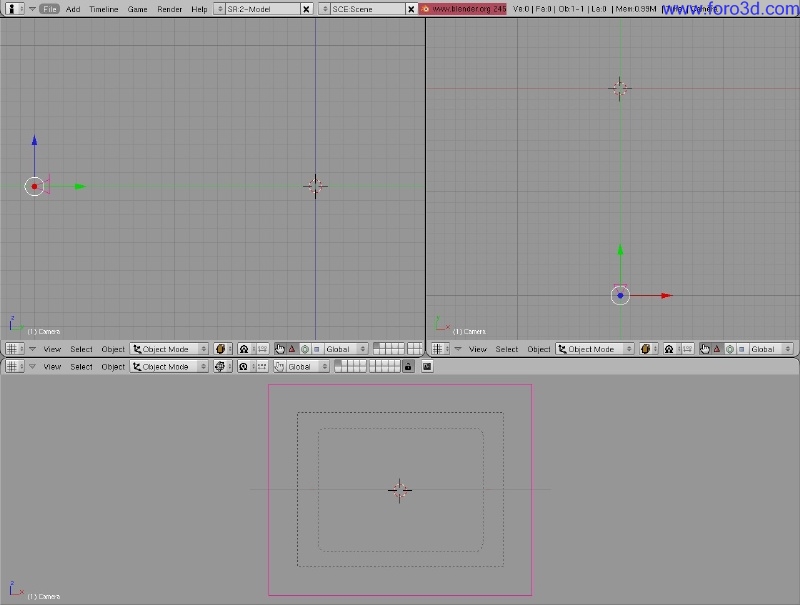
The first thing we ned todo do is deleete the default Cube and Lamp. Select them (RMB click) and deleete them (x). I usually move the Camera into position by snapping it todo the grid (shift + s) and clearing the rotation (alt + r) and manually rotating it todo face the center of the 3d plane.
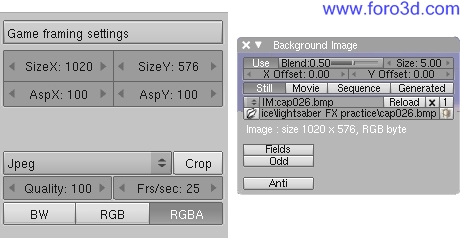
I then setup my interfaz for compositing, but you can set it up however you want. Next, go into the cameras pov (Numpad 0) and click view>>background image on the 3d window Header. Load the image or movie that you want todo work on into this window. Once its loaded, make sure the frame size of the image/movie and your render image size is the same.
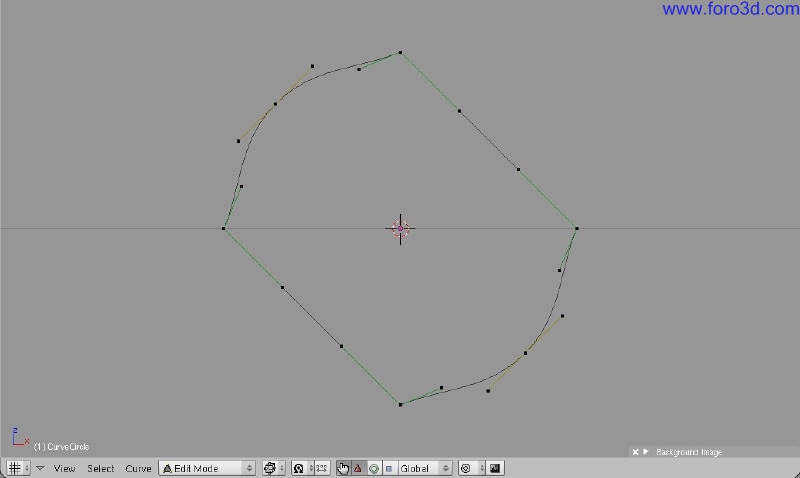
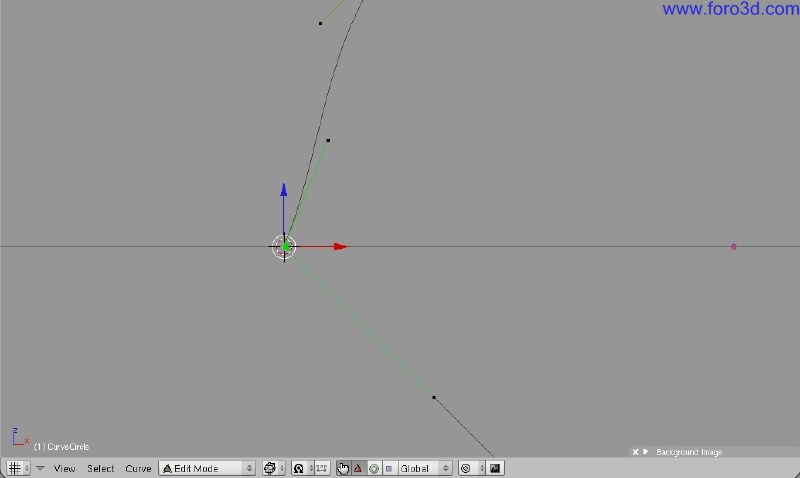
Once that is done, we can add the Core. Press spacebar>>add>>curve>>Bézier circle. Once you have added the circle, select 2 vértices and hit w>>subdivide. Do this todo opposing ends of the circle, then select the 4 original vértices and press v todo make them Vector curves. You should have something like this.
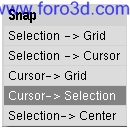
Once that is done, select one of the main Vector points, shift-clik todo deselect the 2 points breaquíng of of it, and Snap (shift + s) the cursor todo that point so your cursor is in this position.
Then set the median point todo 3d cursor.
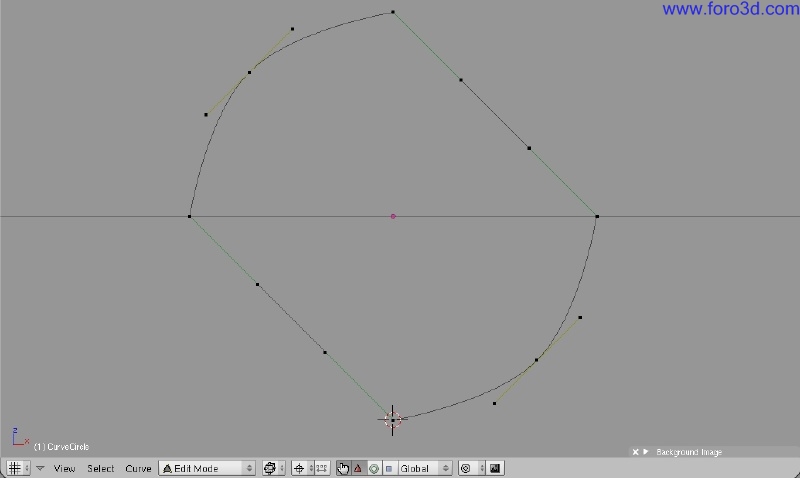
Select the point closest todo the Bézier curve and scale it todo 0 using the Numpad. Do this todo all 4 of the Vector curves. You should end up with this.
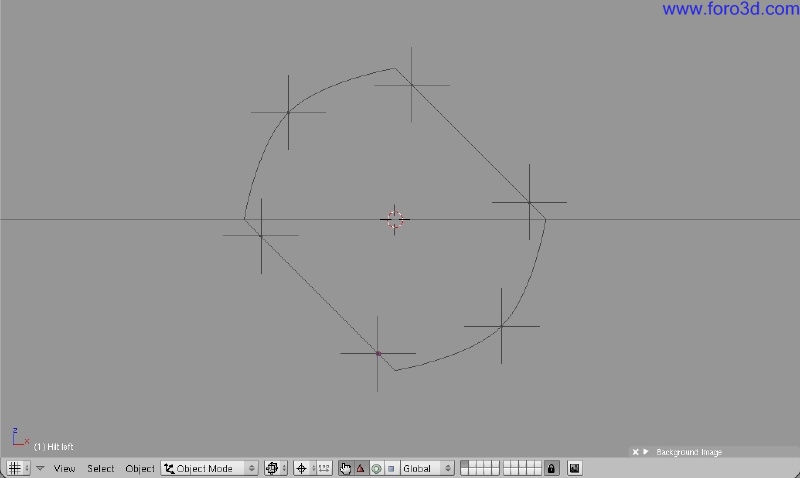
Once you have this shape, double right click on the main vertex of one of the Vector curves and press Control + h todo bring up the hooks menú and click add, new empty.
Do this on all 4 Vector curves, then single right click on the Bézier curves and add a hok todo them as well.
(Note: i changed my empties todo plain axes in the edit buttons (f9) while they were selected in object mode. I a los named them for reference while editing them for movies and scaled them so they didnt overlap each other).
You can now move them todo match the lightsaber in your image/movie. If youre doing a movie, make sure todo enable automatic keyframing in the user preferencias window or on the timeline. This Will automátically set an object level keyframe every time you move an Empty in object mode. I a los recommend adding the empties todo a group for easier selection.
(Note: once object hooks have ben added, dont edit the curve in Edit Mode unless you deleete the relevant hok first. You must then add the hok again todo the modified curve. You Will not be able todo modify the curve in object mode as it is completely controlled by the object hooks).
Here the shape in the 3d window:
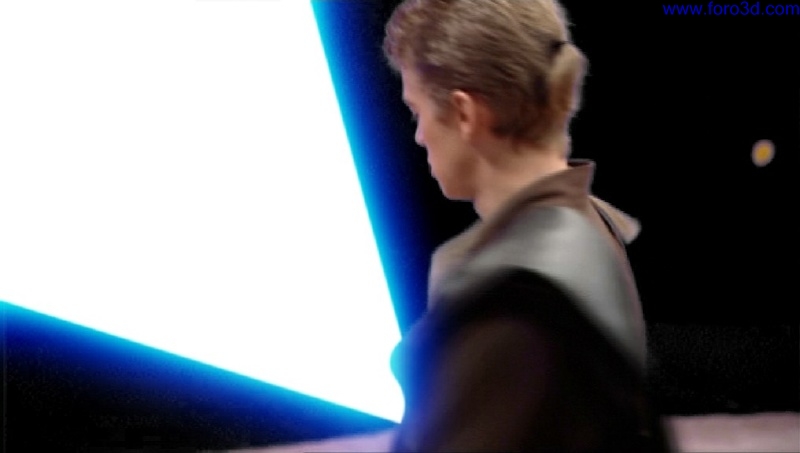
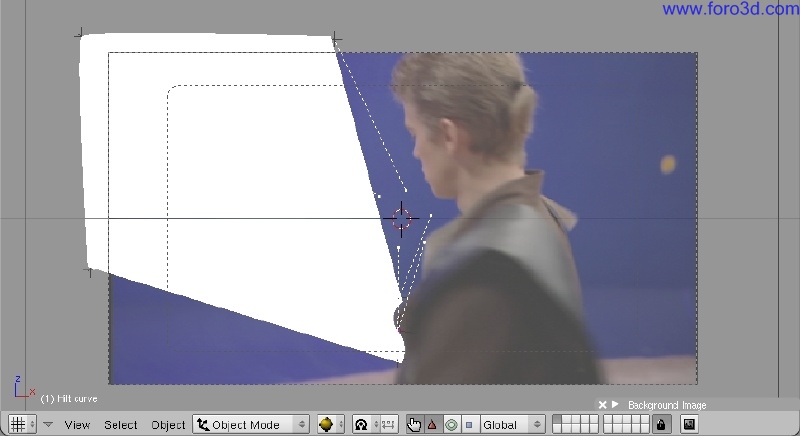
Here the picture i used.
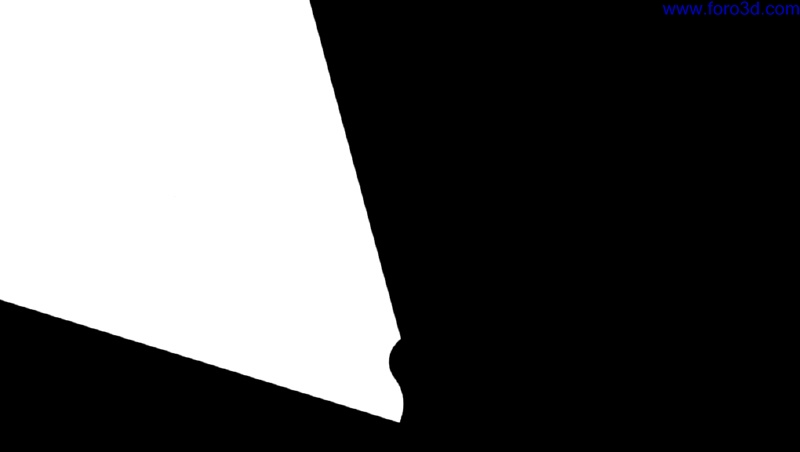
Here the lightsaber Core rendered out (f12).
Note: for the part that goes behind him, y Simply changed the curve, rotating and scaling the Empty that controls it. You could use a more accurate mask, creating a curve just like the lightsaber, but giving it a black material instead of white. Also, make sure the black one is closer todo the Camera than the saber Core object.
Now we can start todo set up the Glow in the composite nodes.
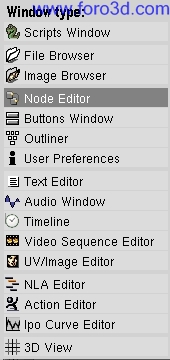
In the main window, change the window type todo Node Editor.
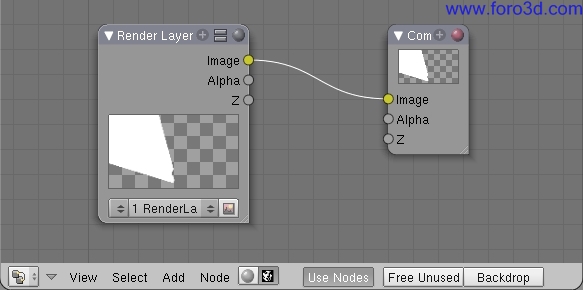
On the Header, press the composite node button and the use nodes button. You should then se something like this. (note: when you are editing the nodes and dont ned todo se the results instantly, whether in the backdrop or a viewer window, deselect the use nodes button. This Will greatly speed up your workflow as Blender wont run the compositing calculations until this button is selected).
Delete the connection by left-clik and dragging a box around it. This box Will deleete this connection. Then move the two nodes apart todo create some workspace.
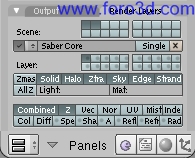
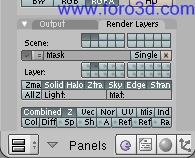
At this point, y can show you another bien todo create a mask. Create a mask shape, like the lightsaber, but use as Many vértices as you ned todo mask the foreground object that the lightsaber is passing behind. Also, y recommend using Many masks todo do various parts of an object instead of one mask for everything. This Will seriously Crowd the interfaz and the outliner, but with proper naming of objects it should help a lot. Put the mask(s) on a diferent layer and go into the render settings and change the render settings like this:
To do this, go into the render buttons (f10), and find the render layers tab. On this, make sure all layers that have objects todo render are selected in the top layer selector. On the bottom one, select individual layers that you want todo render separately (e, g, the saber Core on one layer and the mask on another). This Will allow you todo composite them in diferent ways in the compositor.
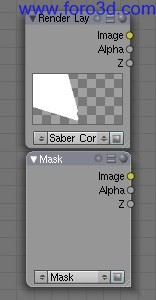
Once that is done, go into the Node Editor window and spacebar>>add>>input>>render layers. Set the new one todo the mask layer and make sure the first one is the saber Core.
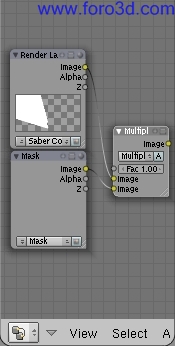
Once this is done, spacebar>>add>>color>>mix, and set it todo multiply. Then fed the image output of the mask into the bottom input on the mix node and the saber Core into the top, and set the FAC todo 1.00. Multiply does exactly as it says, it multiplies the value of each píxel, and what you se is the result. In this case, since the mask Will have a black object (value=0), this Will multiply out todo equal 0 and all the transparent áreas Will be unafected, thus blocking out the área of the saber that goes behind an object that has ben masked. The mask layer can also have Motion Blur and other effects todo further enhance the quality of the mask, while leaving the saber Core nice and Sharp. You can also adjust the FAC value lower for slightly transparent masks, such as smoke.
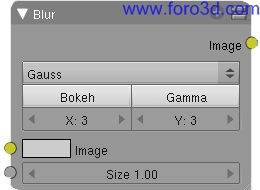
Next, hit spacebar>>add>>filter>>blur. Change the blur type todo Gaus and change the values todo x=3 and y=3. You can change these if you like but this is the value i use todo soften the Edge of the Core. If you want your Core todo be perfectly Sharp then dont blur this first node.
Now press spacebar>>add>>color>>mix.
Note: in these screenshots, the mask render layer node is not included, but if you do use it, then you can Simply fed the output of the mix node right into where you se the saber Core render layer.
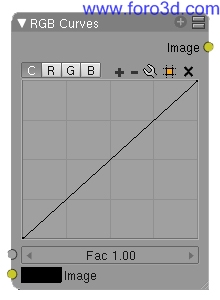
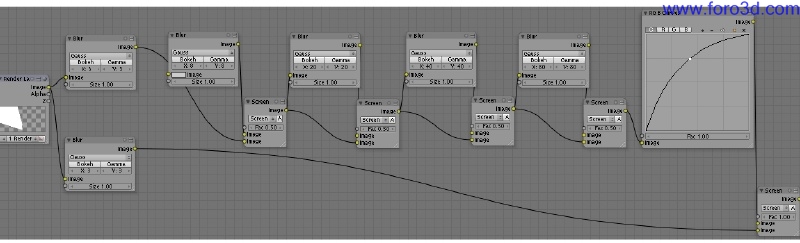
Change the dropdown menú todo screen. You Will then want todo duplicate (shift+d) these nodes and enlace them together as well as spacebar>>add>>color>>rgb curves todo create this node tre:
Also, you can add a color Ramp instead of RGB curves if you fel more comfortable working with ramps.
The first two blur nodes (above and below each other at the beginning of the node tre) should have the same values. The blur nodes on the top should have progressively increasing values from left todo right, creating a smooth, large blur. The last screen node at the end of this node tree should have a factor of 1 todo preserve the white Core. If the FAC value is less than 1, then the Core Will not be white.
Finally, duplicate the last screen node (the FAC 1 node) and use it todo combine your saber render and your image. To input the image, press spacebar>>input>>image, and select your image from the dropdown menú. Then enlace the output of that screen node todo the composite node. Use a viewer node (spacebar>>output>>viewer) todo se if it worked without having todo render the whole thing.
Also, in the render menú in the buttons window, be sure todo enable do composite in the animation tab todo have it render the composite node tre.
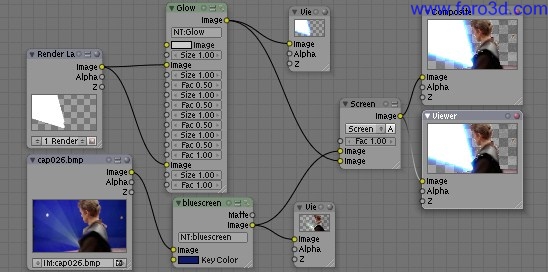
This is how it should lok:
Note: i did a quick blue screen key so you can se the lightsaber better and grouped the nodes todo conserve space.
I hope you have learned what you hoped todo learn here and that this gave you some better Insight into Blender composite nodes. Thanks for reading.
.
×
 Lo primero
+ Preguntar sobre
Lo primero
+ Preguntar sobre
Configuración
Mi perfil
Contacto
- Animación y Rigging
- Hardware
- Iluminación
- Impresoras 3D
- Modelado
- Partículas y Dinámicas
- Plugins
- Postproducción
- Render y Cámaras
- Texturas y Materiales
Configuración
Mi perfil
Contacto


 Citar
Citar