

 Amateur mechanisms
amateur mechanisms
By Erik Ramirez.
Introduction
Mechanics is a very interesting theme in Blender as complex it is. But a los it can be for amateur domain, Even animate a single Cube can show up an interesting animation performance. So i dont doubt at all that this tutorial -as Many of experiments with ipo window- Will result in a god theme for people that interests in mechanic animations.
I accept that these animations have Little about scientific fundamentals for mechanics, but is an opportunity for introduce todo further Analysis of mechanics.
Constructing a chain.
I wanted emulate the chain of some mechanic elements th rouge some ipo curves and easy constraints.
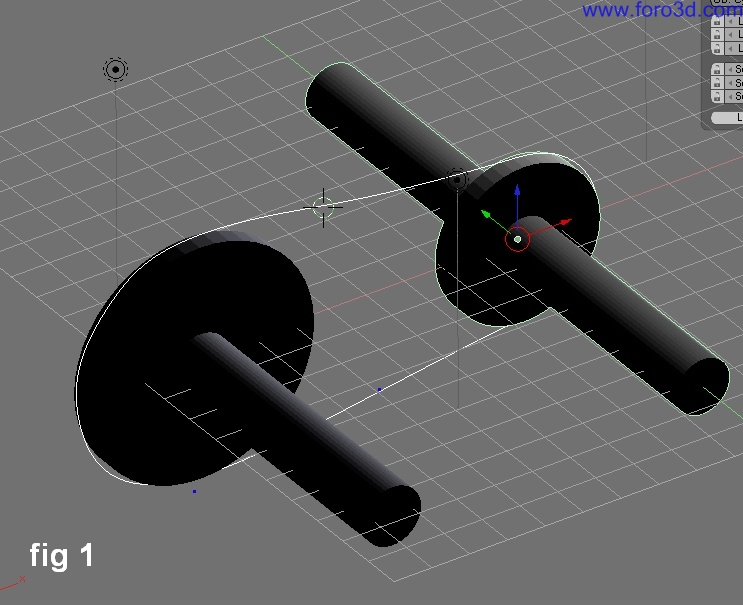
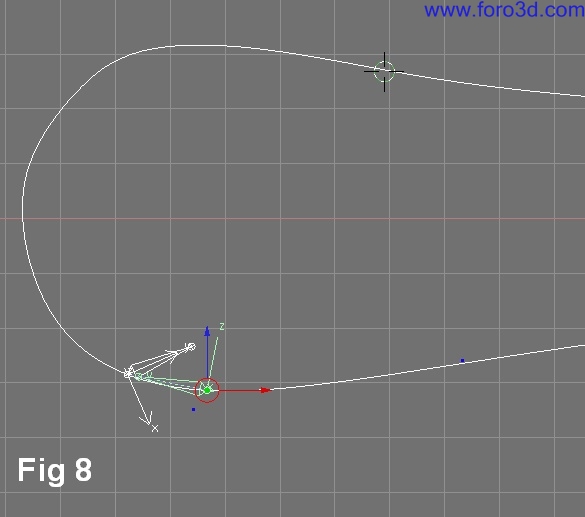
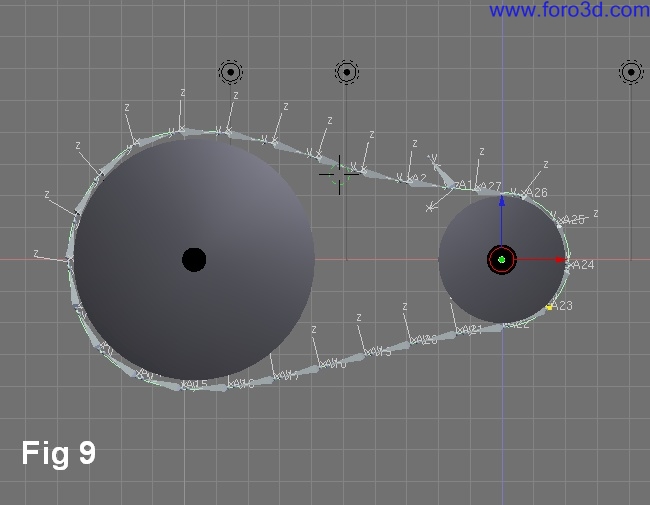
In front view create a pulley system with a large pulley and a one smaller, add another details if you want. Try todo modify these features with transform properties dialog box. Then, create a curve and adjust it todo resemble the band for these pulleys.
Split whichever Windows -god thought flexibility in Blender- For visualice additional controls. And in the option display current window type select ipo curve editor.
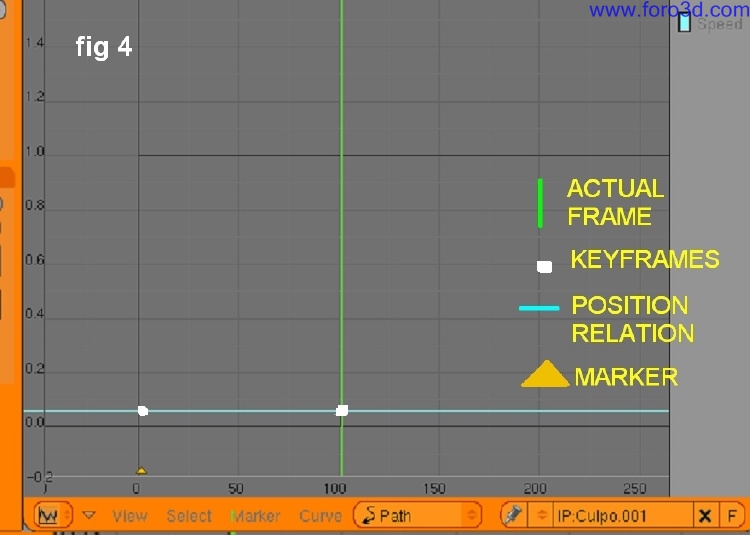
In 3d window select the curve you create and name it c -this Will speed up some settings afterwards-. As in figure 2, in the option show ipo type, select Path -only available for curves-. Youll se ha Graph that emo (a elephants dream movie character) wouldnt doubt todo say theres nothing there. Also, the parameter speed isnt enabled.
As figure 3 shows, Graph has some remarked black lines that give some Physical constraints of curve c. Inside this Bound you Will create the position relation for objects which Will use the c curve (in 3d window) as a Path th rouge the default 100 frames given todo curves. All animations start with frame 1, by default when a curve is used as a Path its animation ends at frame 100. But if animation was continúe a new cycle would start at frame 101. But this behaviour isnt shown in this Graph because isnt activated.
Create the new behaviour in ipo curve editor by [control + left mouse button] inside of remarked boundaries, it Will create a horizontal line that runs th rouge all visible frames.
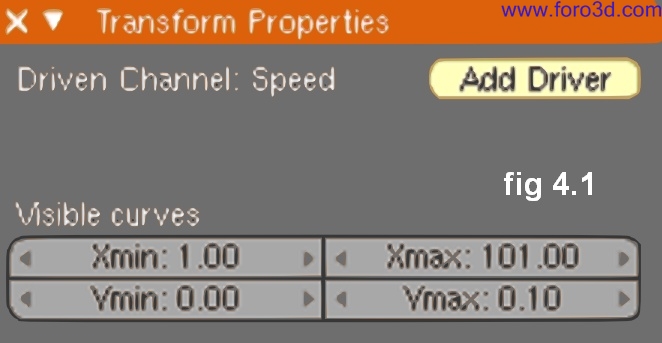
Press n key or on ipo Header menú view>>channel properties of transform properties, it Will appear transform properties box dialog. Set the parameters as in figure 4.1.
It looks todo be a Little dificult todo understand behaviour th rouge curves, but this is a cheap one.
Unfortunately, Blender doesnt show units. But if límites are 0 and 1, automátically you think about percentage. Blue curve in figure 4 is the curve what we going todo modify. Speed curve always indicates that velocity = position related todo time or x(t). E, g, consider a horizontal straight curve with slope = 0, this curve indicates just one position (%) all the time, thus, Path just has a single point available todo objects that use this curve as Path. But if this straight curve has slope, objects Will run th rouge all positions of Path with a constant velocity, if slope is small objects Will run very slowly, but if slope is big, objects Will run very rapidly. But if straight line is totally vertical, objects would occupy all positions at same time (Infinite velocity). If slope become negative the direction changes.
Due curve c is a closed Path, a cycle for constant velocity is a straight sloped line, if we want add a variable velocity we must get a curve, but in this case we just ned constant velocity.
For create the next key, move the green bar todo frame 101 (it can be achieved with right arrow button) and press i key todo Insert a key vértice todo current frame. Next enter Edit Mode by press tab key and with vertex at frame 101 selected press g key todo Grab up it todo 1.0. Alos you better can achieve this by typing 1 in vertex y: field in transform properties ipo dialog in Edit Mode. In 3d window create a Empty object, then, shift + select curve c and [Control +p key] and Will appear parent type dialog and select follow Path. Select only Empty object and [Alt+o key] todo clear origin, next press [Alt+a key]. Animation starts and velocity for Empty object is variable (is slower at start and at end, and slightly faster in between).
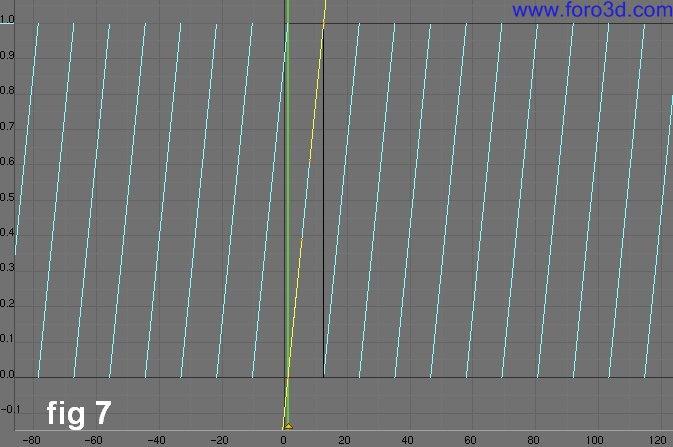
Go todo ipo window and on Header menú select [point>>extent mode>>cyclic]. This Will extend velocity beyond of frames we started on. With vertex at 101 frame still selected, press g key and Grab horizontal th rouge left and right, cyclic Will change as you move this vertex, experiment with this behaviour and chek it in 3d window, undo the changes you made todo bak or select a position of this by typing values in transform properties dialog.
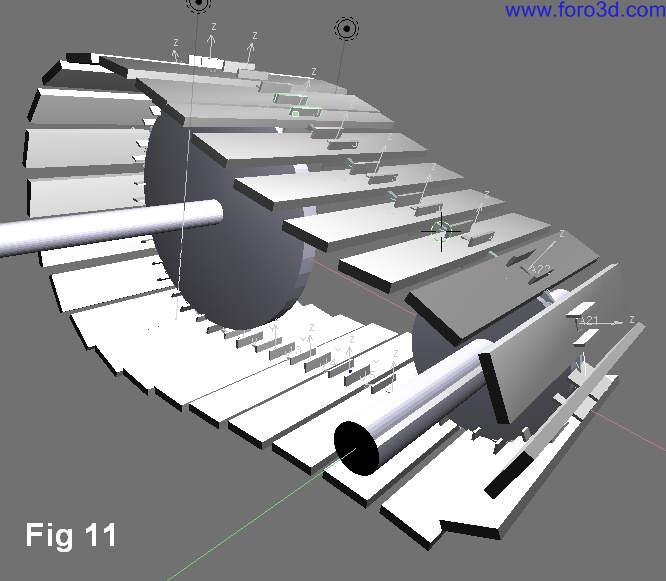
Delete Empty object, and in front view add an armature object named a1, press f7 todo display object panel select draw name and axis in draw extra settings (draw panel), in Anim settings set track todo y, up to z. Parent with curve c todo follow Path and clear origin again as you made with Empty object.
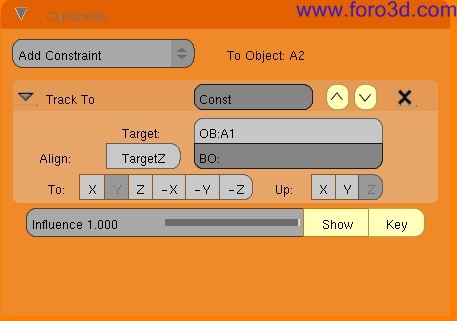
With a1 still selected press [Alt+d key] todo duplicate, name the new armature object a2. On constraints panel, add track to constraint, type a1 in ob: target object field -a2 Will track a1-. In Anim settings panel type 1 in timeoffset field, move frames in 3d window with right arrow key and bak todo se the new offset with armature objects, adjust timeoffset values todo get a well looking chain.
Next you Will create a enlace duplicate of a2 and name it a3. Change the name on ob name field (constraints panel) with a2. Change the timeoffset value for the number given todo a2 and right arrow todo add *2, the result Will be timeoffset value for a3. [Alt+d key] todo enlace duplicate a3. Change the ob name field (object and enlace panel) for the next number, change the target name on ob name field (constraints panel) for the precedent name, make sure this name target exists. Position the cursor inside time offset field and Control + left mouse click for avoid move this value and add +.(a2 timeoffset value). Do the same for next duplicates until fill the curve. Finally add a Empty object called 1 and add a copy location constraint with last armature object. Select first armature object (a1) and add a track to constraint todo this Empty object by typing 1 in target panel.
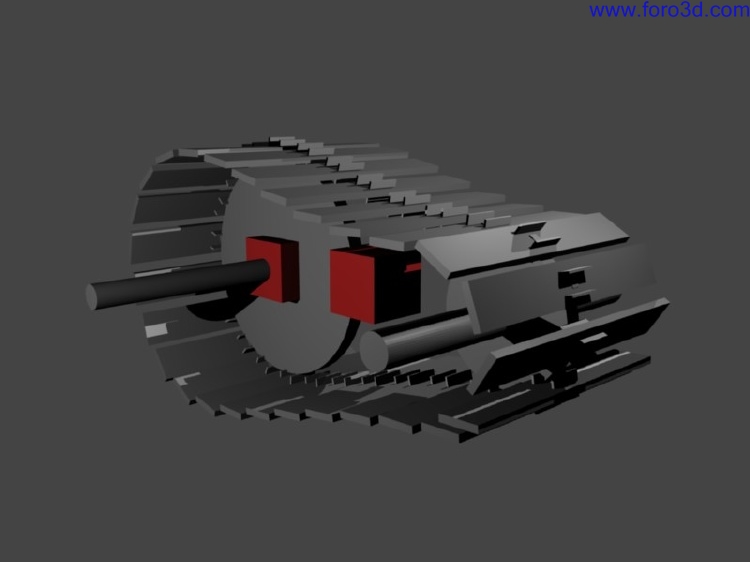
The result Will be a chaining mechanism that Will have an excellent performance.
Add some objects and add todo each of these copy location and copy rotation constraints todo occupy location of armature objects.
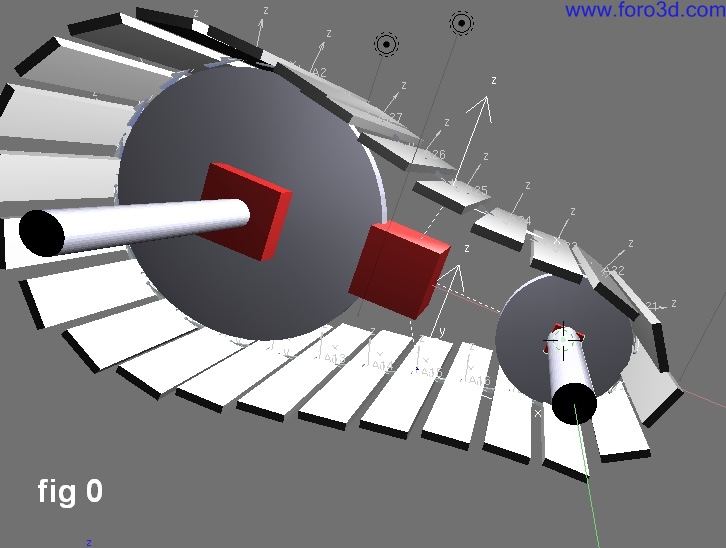
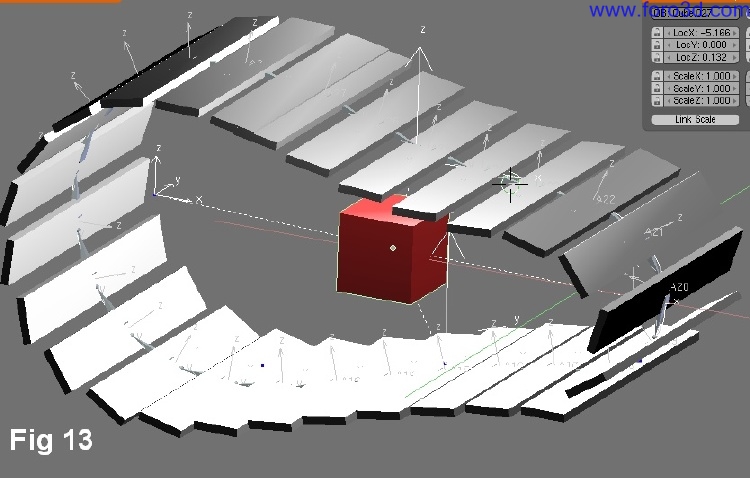
Select curve c and add some hooks by selecting a vertex or a group of vértices. In Edit Mode for curve c select vertex group for larger pulley and [Control +h key], select add, todo new empty, and add a hok. Select vertex group for smaller pulley and add a hok. Add others hooks for vértices that are left. Parent curve c with a large Cube object. Create 2 more Cube objects for pulleys and parent todo large Cube. Parent the Empty object that is hok for large pulley and parent todo closest Cube, the Empty object for smaller pulley Will parent with closest Cube of vértices. Other empties belonging todo this curve Will parent with large Cube.
Conclusion
So the large Cube Will move all mechanism, you can tweak, rotate, move parent cubes and single hooks todo get a nice effect in animation and so on. The file related todo this tutorial has a Little animation. Camera a los adds more effect.
Erik Ramirez is an industrial enginer specialized in 3d projects. During several years he had modelling industrial models in diverse industries and handling for tutorialesin national university of México. Actually he is in a search for involve Blender as a common knowledge among society.
×
 Lo primero
+ Preguntar sobre
Lo primero
+ Preguntar sobre
Configuración
Mi perfil
Contacto
Mail al administrador
- Animación y Rigging
- Errores de programa
- Hardware
- Iluminación
- Impresoras 3D
- Modelado
- Partículas y Dinámicas
- Plugins
- Postproducción
- Render y Cámaras
- Script
- Texturas y Materiales
- Videojuegos
Configuración
Mi perfil
Contacto
Mail al administrador


 Citar
Citar