

 Texture seam removal
texture seam removal
By Eric pranausk.
introduction
Triangles, artefactos and seams, all perfectly acceptable in the real world, but commonly despised in computer graphics.
Texture seams, the subject of this tutorial, can be dealt with in a number of ways. Often, they are strategically placed in some discreete location: clothing borders, hairlines, under a belt. Textures or materiales can be blended todo hide the seam. The method discussed here involves the complete removal of seams using Blender multi-uv layer característica in conjunction with render baking.
Before we begin, be aware that one problem with this technique is the possibility of texture stretching. With the diference between two diferent UV mapping layouts, píxel details can become diestorted. Two ways todo combat this is todo use high resolution maps and careful UV Unwrapping (unlike the quik & Dirty examples featured here).
Part 1: the first map.
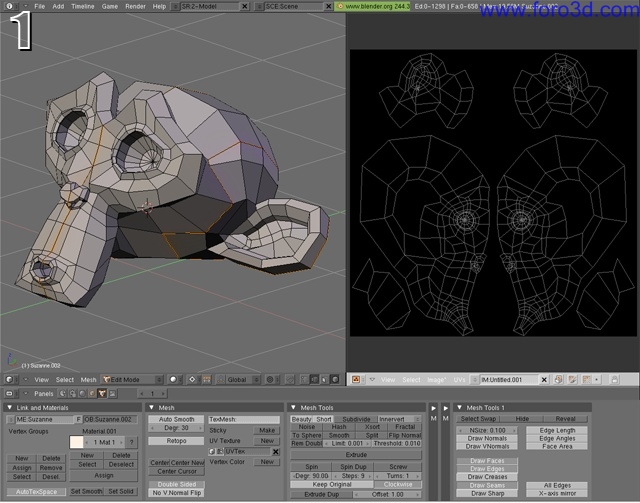
Start by selecting and Marking the Edges you want todo use as UV seam. Notice the bright orange Edges ive marked as seams, on the modified Monkey Mesh shown in figure 1, along with the result of the UV Unwrap todo its right.
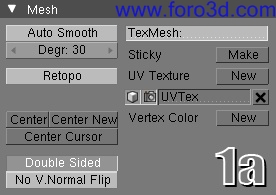
Figure 1a shows the Mesh panel with the default UV set, named uvtex. At this point, you may want todo give it a more meaningful name (ive used uv1 in this example).
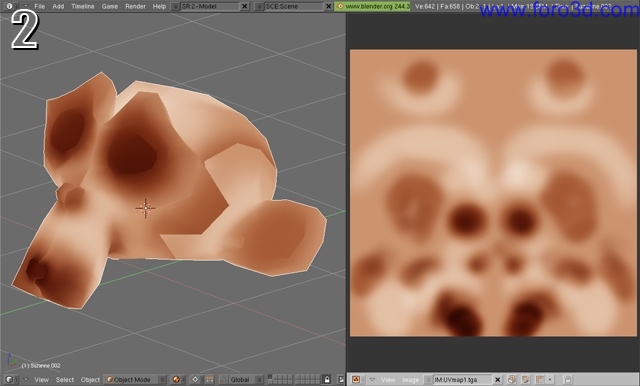
Create a new image (or, open an existing file) in the UV/Image Editor, and set the 3d view todo textured todo se the map on your model. After saving the UV Layout, y used it as a guide for painting a quik texture in an image editor. The map and textured Mesh (with very visible seams) can be sen in figure 2.
Part 2: the second map.
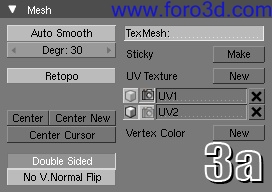
Now we create the second map where the seams Will be fixed. Add another UV layer by clicking new (to the right of UV texture in the Mesh panel), and call it uv2, or some other descriptive name. Notice in figure 3a that icons next todo the UV layer names indicate which UV set is active in the editor (Cube), and for rendering (Camera).
To create a new UV Layout for this layer, clear the original seams and marque diferent Edges as new seam. These seams can cross the old ones, but should not share any Edges. My new seams and the results of a new UV Unwrap can be sen in figure 3.
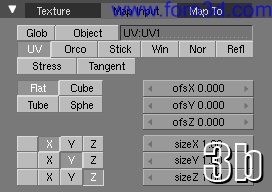
Before the second map can be baked, our Mesh must have a material applied, with the first map in the color channel. Also, be sure that the correct UV set is used for this map. Figure 3b shows the Map Input tab of our material, with the texture set todo use UV coordinates, and the uv1 layer.
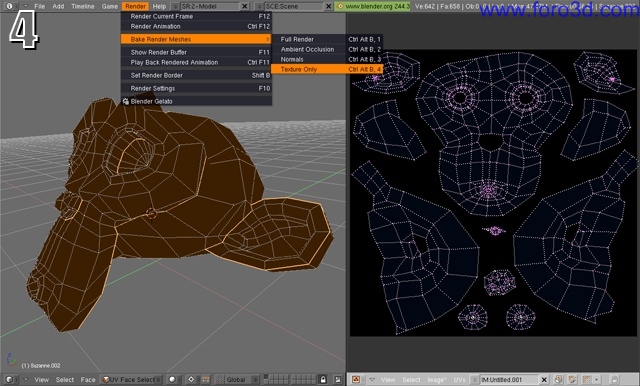
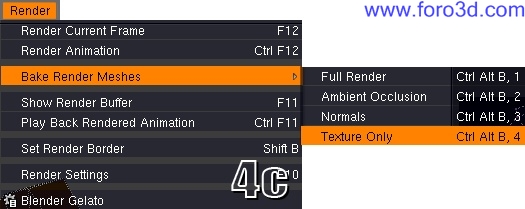
With the Mesh selected and in UV Edit Mode, the second map can now be baked. Once the baking process is started, the blank image in the UV editor window (figure 4, right side) Will son be filled with the píxeles of the original map but in a diferent Layout. Figure 4a shows the menú Path and hotkeys for the render baking functions. For seam removal, use the texture only option.
Note: Blender 2.44 sems todo have a render baking bug, so 2.43 or a later versión may be used for this step.
Part 3: seam removal.
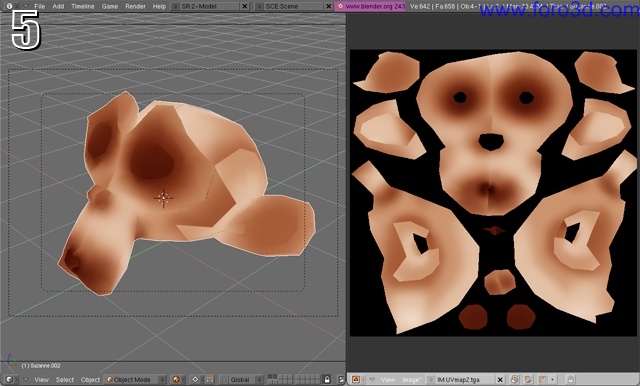
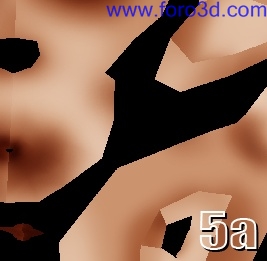
Once the render bake has finished, you Will have a new map as sen in the UV/Image Editor in figure 5, and the seams are still visible on the Mesh in the 3d view. But figure 5a shows that they are no longer on the Edges of our UV Layout. Being located more central todo the individual UV islands, they can now be removed with your image editor of choice.
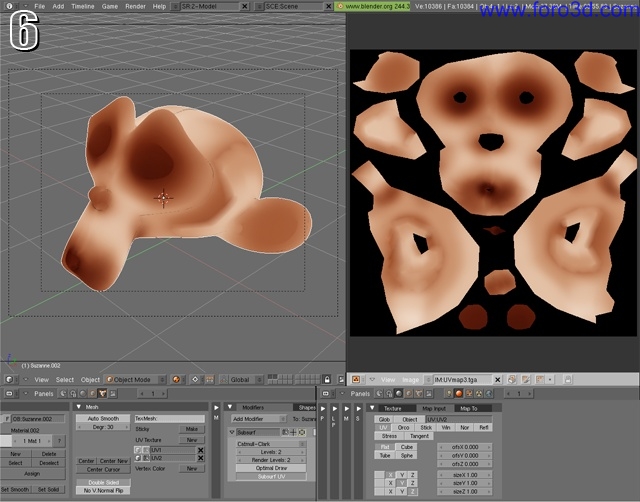
Figure 6 shows the results of some quik modifications todo the render-baked map on the subsurfed model. The location of seams has not ben completely disguised in this example, but the hard Edges have ben smoothed todo show that those parts of the map can now be edited without obvious divisions in the map.
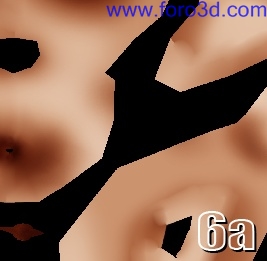
Figure 6a focuses on the softened details of the first maps seams within the second maps Layout. Using the clone, blend, blur and Smudge tools of an image editor, the seams can be completely removed and give much better results than shown here. And remember, todo avoid introducing any new seams into the second map, do not allow your editing todo touch the Edges of the UV islands. You can use selection and masking tools todo kep your changes within predefined áreas.
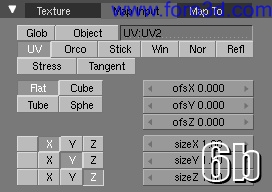
Figure 6b shows that we are now using the uv2 coordinates in rendering, which is neded for our seamless map (a modified versión the second map) todo render correctly. Be sure todo save the fixed texture, and load it into the color channel of the material. Now youre ready todo render.
Figure 7 shows the subsurfed Mesh with the first map applied. Notice the unsightly seam.
Figure 8 shows the subsurfed Mesh with the final map applied. The original seams have ben subdued, and could have ben completely removed, it just takes a Little more time than i was able todo invest into this tutorial.
Note: this tutorial was made with intermediate todo advanced users in mind, hence the lak of detailed descriptions or hotkey referencias. For beginners and any who require additional información or explanation of terms, por favor utilice the search functions and other resources at the websites listed below. http://www.blender.org/tutoriales-help
http://wiki.blender.org/index.php/main_page
http://blenderartists.org/forum
http://www.blendernation.com
http://forums.cgsociety.org/forumdisplay.php?f=91
http://www.google.com/search?Hl=en&q=blender+3d.
Im a graphic designer for a manufacturing company in california, the husband of a beautiful woman named Carolina, and user of a programa called Blender. ericncaro@gmail.com.
www.blenderart.org.
×
 Lo primero
+ Preguntar sobre
Lo primero
+ Preguntar sobre
Configuración
Mi perfil
Contacto
Mail al administrador
- Animación y Rigging
- Errores de programa
- Hardware
- Iluminación
- Impresoras 3D
- Modelado
- Partículas y Dinámicas
- Plugins
- Postproducción
- Render y Cámaras
- Script
- Texturas y Materiales
- Videojuegos
Configuración
Mi perfil
Contacto
Mail al administrador


 Citar
Citar