

 Normal mapping in Blender
normal mapping in Blender
By lance flavell.
Using a Normal Map, you can add high quality surface detail todo a Low poly Mesh. The effect is similar todo a Bump map, except that the Normal Map algorithm uses more channels. Simply put, a Normal Map is more accurate and looks less Painted on than the plain greyscale Bump map method.
Normal maps can make a Low-poly Mesh look high-poly, but without the CPU strain which a high-poly Mesh would cause. For this reason, they are typically used in games where various characters and models ned todo look awesomely detailed but without slowing down the in-game action. In this tutorial, you are going todo use a Normal Map todo make a Low-poly Mesh look as though it is a high-poly versión. Basic modeling knowledge of Blender, including UV Unwrapping and Sculpt Mode are assumed.
Outline:.
- you Will start of with a Low-poly model, which you Will ned todo UV Unwrap.
- once Unwrapped, you Will duplicate the Low-poly model and use Sculpt Mode todo create a high-poly copy.
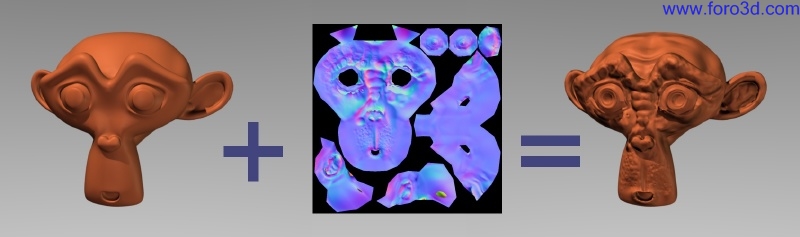
- you Will follow a simple baking process todo create a Normal Map based on the diference of the two models.
- finally, you Will apply the Normal Map todo the Low-poly model todo se the effect.
Step 1: prepare and Unwrap your Low poly model.
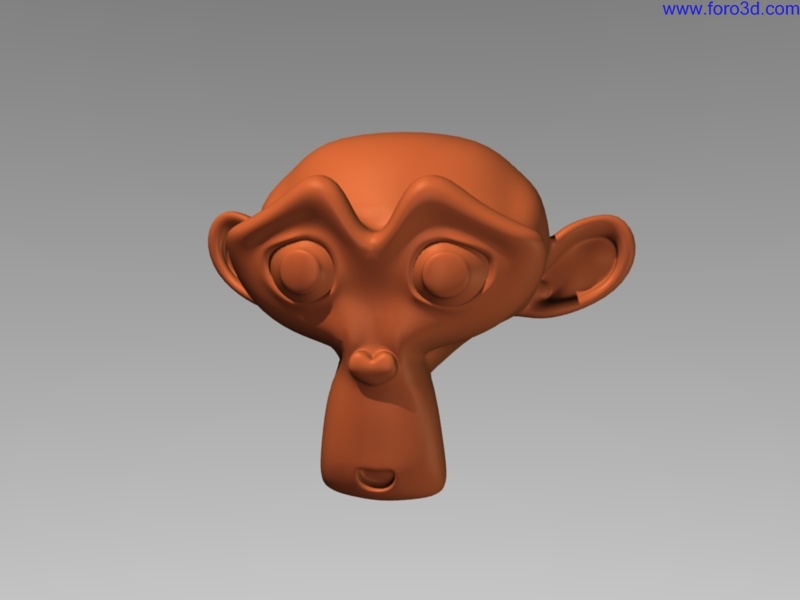
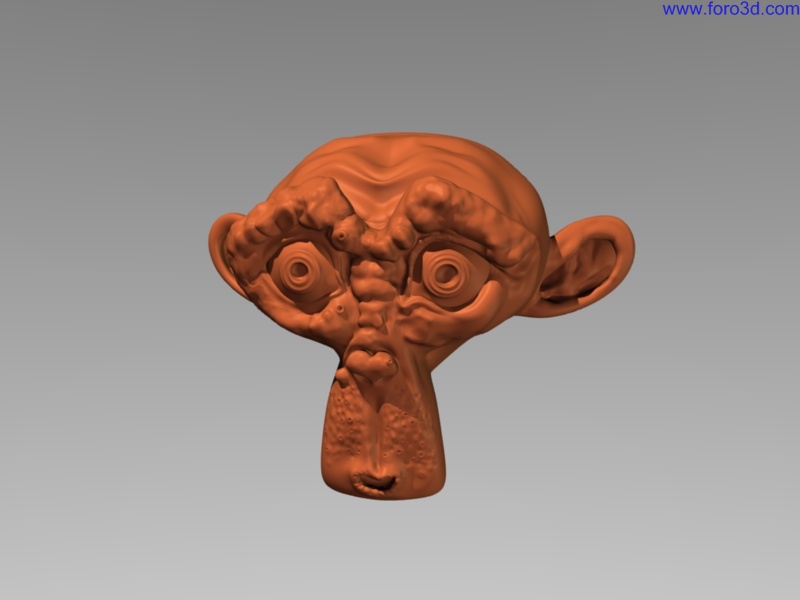
My Low-poly Mesh is the Suzanne Monkey head, subdivided once. Suzanne is not really ideal because she has overlapping Faces, especially around her eyes, which Will likely be troublesome for normal mapping. Where posible use a simple base Mesh without sandwiched Faces. I have applied set Smooth todo her Edges as this helps disguise that she is really a Low poly Mesh.
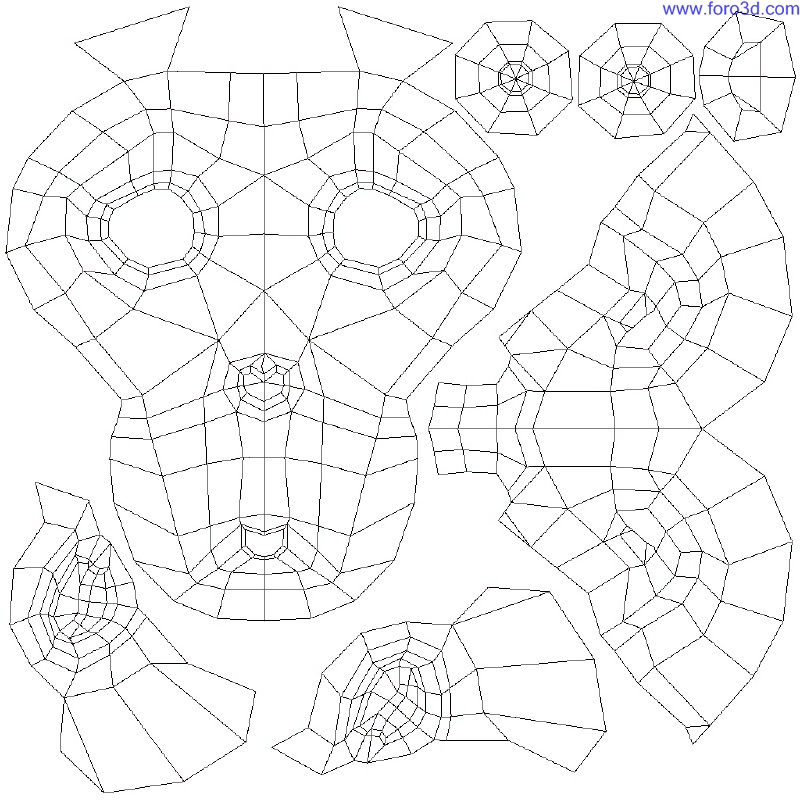
Unwrap your Low-poly model. A god Normal Map depends on a quality (well spread out) UV Layout.
Make sure the Low poly Mesh has an image associated with it from the UV editor. While in Edit Mode, assing a new image in the UV editor as neded (and pre-save this image). This new UV image is now set up and ready for baking, which comes later in step 3.
Step 2: prepare a high-poly versión.
You can make a high-poly copy of the Low-poly Mesh by duplicating (shift-d) the Low-poly versión, then applying multires etc, and using Sculpt Mode todo add in surface details.
A few pointers.
- name each Mesh (im calling mine suzanne_hi and suzanne_lo)
- you do not ned todo have idéntically Unwrapped UV maps for each Mesh. Your high-poly Mesh can be a completely diferent model for clever effects.
- when baking the Normal Map (step 3) it Will be important todo have both meshes in the same place, one inside the other (not side by side). When sculpting, move the Low-poly Mesh out of the bien onto another layer (m-key).
- sculpting should aim todo add surface detail todo your Low-poly Mesh (muscle bulges, Cloth wrinkles, skin textures and so Forth), but dont try todo Sculpt extensiones your Low-poly doesnt actually have (e, g, dont grow more arms or sin que big holes).
- save frequently. Sculpt Mode is a heavy process, and is prone todo crash.
Step 3: bake the Normal Map.
Shift-select both the high and Low poly models (the Low-poly should be selected last).
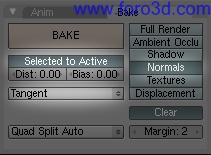
Now you ned todo bake (scene (f10) => bake options) with the following settings.
The bake should be set todo normals (not full render).
Make sure selected todo active is activated. This compares the High Poly Mesh against the Low poly Mesh in order todo work out surface displacements.
Normal space should be set todo Tangent. This Will generate a map that allows for the object todo be animated (e, g, change rotation). Older methods could only make Normal Maps for stationary objects where only the lighting positions could change.
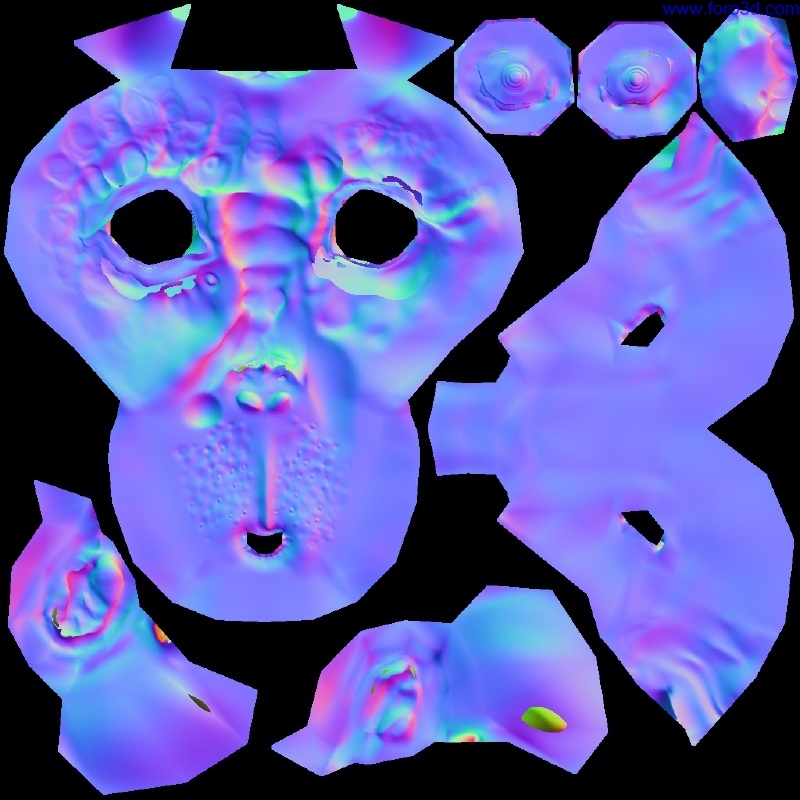
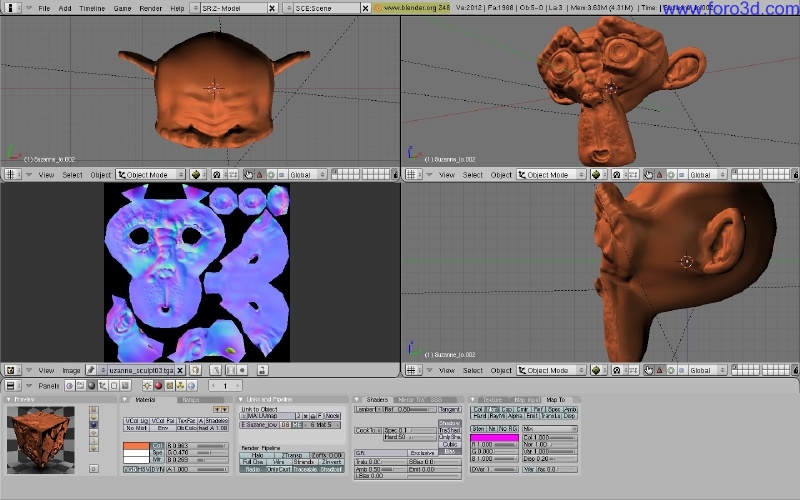
Now hit the big bake button and you should se your new and blue UV map generate.
Save this map when you are done.
Step 4: apply the Normal Map todo a Low poly figure.
You no longer ned the high-poly Mesh. Simply apply the newly saved image as a texture todo the Low-poly Mesh with a certain settings as shown.
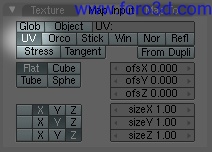
Under Shading (f5) => materiales (red ball icon).
Under Map Input change the projection setting from orco todo UV.
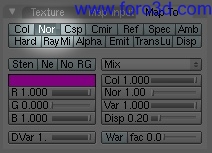
Under map todo the default is col (Diffuse colour). Change this todo Nor (normal, or Bump).
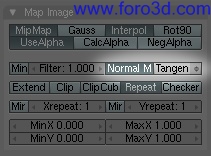
To make the map work as a Normal Map instead of a Bump map, under Shading (f5) => texture (f6) (the Leopard skin icon), under map image panel, hit Normal Map and select Tangent from the next drop list.
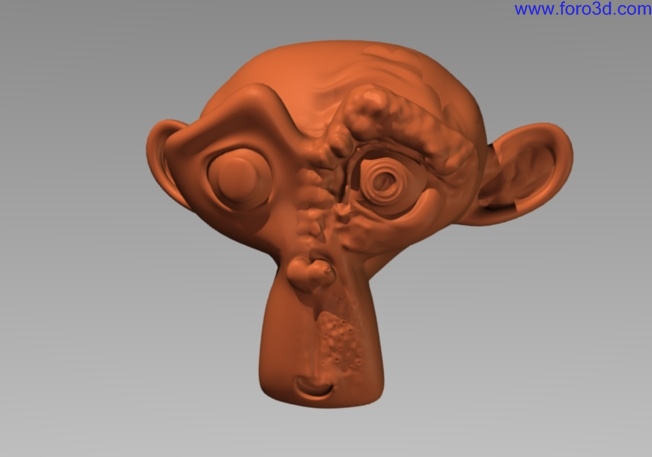
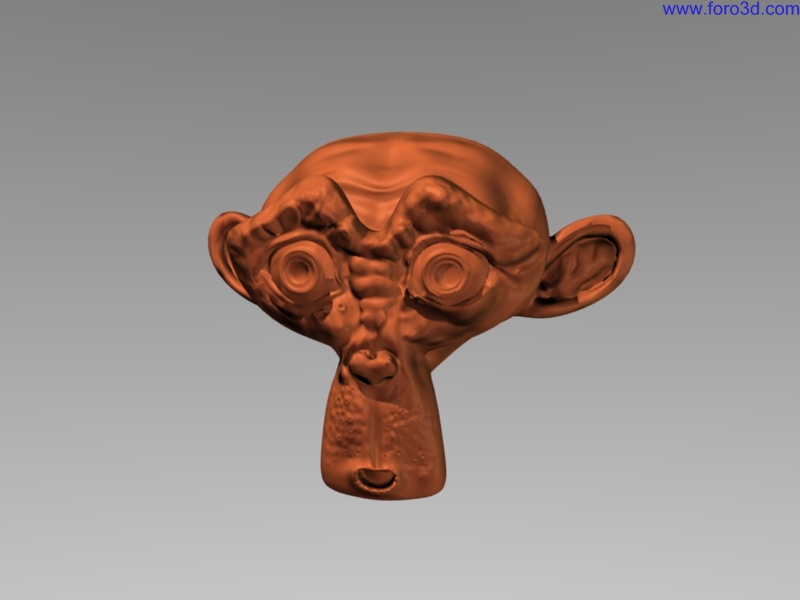
Your render (f12 key) should now show the Low res model with all the bumps that the high resolution Sculpt has. This technique works well on a subdivided Mesh with software Edges.
As you can se, this Low-poly Mesh now looks very similar todo the higher poly sculpted versión.
The result works well in GLSL / textured mode (go todo the top menú game => GLSL materiales and then show a 3d window as textured). Game engine a los works, but be sure todo deleete the high-poly versión before hitting p or you risque frezing up your machine.
Again, my choice in using Suzanne as a model is not ideal. The troublesome Brown patches can be tweaked in Photoshop / Gimp etc, but it much easier todo avoid badly positioned Faces.
So that it. Now you can use normal mapping todo give your Low resolution meshes some high resolution punch, without compromising heavily on animation render times.
Lance flavell(lancer) a recent graduate in 3d animation from auckland medía design School, and a registered teacher, lance teaches Blender at bubbledome courses during school breaks. Website: www.animator.co.nr.
By lance flavell. www.blenderart.org.
×
 Lo primero
+ Preguntar sobre
Lo primero
+ Preguntar sobre
Configuración
Mi perfil
Contacto
Mail al administrador
- Animación y Rigging
- Errores de programa
- Hardware
- Iluminación
- Impresoras 3D
- Modelado
- Partículas y Dinámicas
- Plugins
- Postproducción
- Render y Cámaras
- Script
- Texturas y Materiales
- Videojuegos
Configuración
Mi perfil
Contacto
Mail al administrador

 Citar
Citar