

 Product visualization
product visualization
By Claas Kuhnen.
Introduction fast rendering times are always a neded and desired característica in a time Wise very competitive environment like industrial design. It is very common today that the product designer only makes very rouge render, which are being presented todo marketing, while the 3d rendering department or an outsourced service bureau is producing more realistic, but a los time consuming product representations.
For very fast and preliminary product representations, the designer only neds todo commúnicate material selection and shape todo marketing. Those product render give answers as todo which part of the product is high Glossy, which part is Chrome, what is Rubber, where is maybe an interfaz element or decal. Thus an integral part of product rendering is the decisión making about material selection.
In the last 2 years, Hyper Shot has become a product of choice for such a task. It provides the artista with very fast previews and instant feedback. The progressively refined render are done with global illumination and thus provide very fast, accurate and god looking product render results.
Blender, of course, does not ofer an internal full GI or a fast progressive render feedbak like Hyper Shot. However with Blender, we can create graphically stunning looking product representations, which are ideal for característica commúnication and blazing fast todo render for animations. In particular the last one - Animation - Is where Hyper Shot lacks completely and Blender can provide an excellent number of tools. What i am going todo show is actually inspired by a free tool for Rhinoceros 4.0 called auxpecker, which gave me the idea todo experiment with this approach in Blender with GLSL. http://auxpecker.blogspot.com/
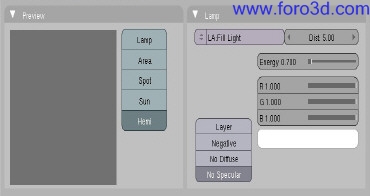
2 light-setup: while Blender does not have an internal full GI system, it ofers real-time Shading with GLSL and very fast rendering appróximate Ambient Occlusion. Glsl, which was mainly driven th rouge the last open-game Project yo-Franky, provides us with the neded technology todo actually preview Diffuse and Specular material properties interacting with Many built-in light types and can a los be used with UV mapped and flat projected image textures. A great característica of GLSL is the ability todo show Diffuse and Specular light Shader properties in real-time, interacting with the present set of lights. There are two lights which in particular are of interest:
- Hemi lights - Producing a fake, but still god looking and fast rendering GI effect.
- spot lights - Casting buffered shadows in realtime.
Other light types are:
- Lamp light - Producing a Spherical light element.
- sun - Producing parallel light rays.
Area lights are not supported for real time previewing, but work during rendering.
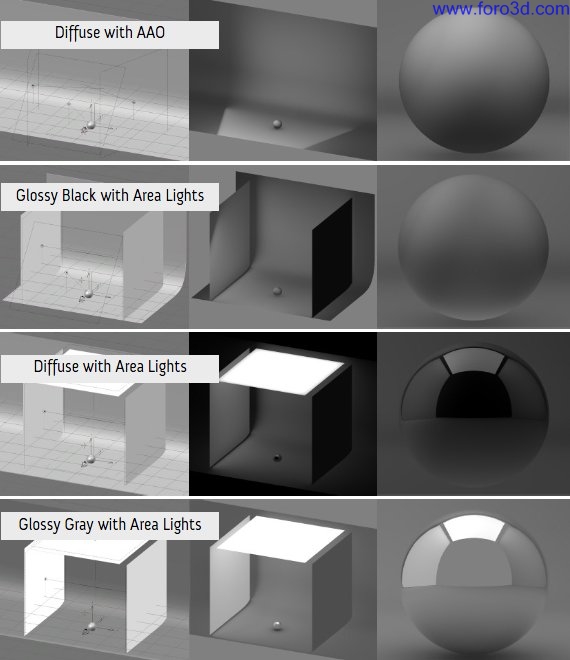
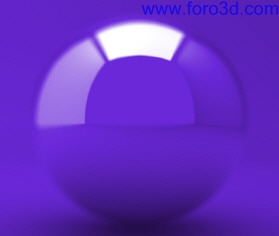
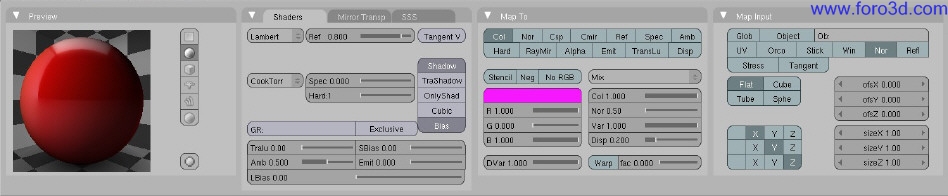
3 material-setup: todo tackle the issue of evalúating a material without time consuming Raytraced mirror reflections, we can actually generate pre-rendered material previews. They are in the shape of Spheres and are mapped as a faq environment over the object by using the normal Vector Map Input.
The clue is todo prevent the use of any easy todo recognize environmental mirror reflection, instead creating a Studio setup which only provides información about where light sources are and how they would Illuminate the scene and the ball. You design a simple backdrop, place a ball, and position the Camera very close todo the ball, trying todo find a scale for the Mesh where the mirror reflection of the Ground plane would be covering the lower half of the ball.
With this setup you can add lights. Thre área lights are suficient. They are placed left, top, and right. They can all have diferent energy values, thus rendering the ball illuminated in a diferent and not like with AO Even way. To generate unique results, you can play with size, position, and strength of those lights and create materiales where a strong light is only coming from top, the main light coming only from the side, or light is coming from all directions evenly. To make the área lights visible on a Chrome ball, you a los ned todo add light meshes. By applying correct values for the emit value, you can match the brightness of those meshes todo the light energy of the corresponding lights.
By using AO, you can darken the área between sphere and Ground plane. An up facing área light can a los brighten up the lower part of the sphere simulating indirect illumination and bouncing lights.
Colored.
Colored and blurred.
Colored and Lens blurred.
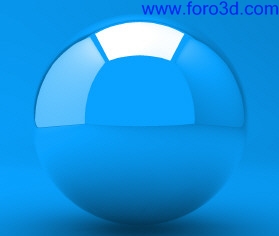
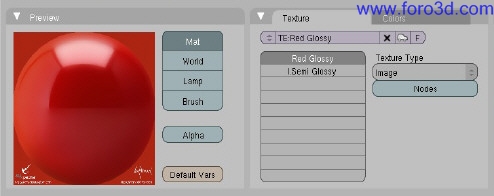
If a Glossy material is desired, the sphere should be using a mirror reflection and the scene should have the visible light meshes be present. Those are being used todo generate a Specular highlight instead of using the Specular light shader, which i turned of in this case. Again with the diferent amount of emit values, the reflections of those boards Will be diferently bright and providing a convincing Studio setup.
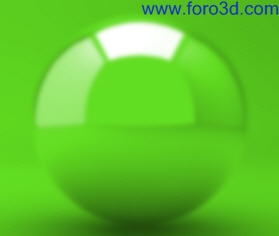
For a black material, the world should a los be set todo black, darkening the mirror reflection of the ball. For a red ball, the world should be set todo neutral gray. This bien the rendered result can easily be coloured in Photoshop todo generate quickly colored variations of the same gray base material. By using the Raytraced function for mirror reflection, you can a los make use of Fresnel todo customize the reflection value on perpendicular and Tangent surfaces relative todo the Camera.
Of course todo create blurred reflections or brushed metal, it is a los posible todo use Blender Glossy function for mirror reflections. However todo save time, this tasque can easily be done inside Photoshop by applying a blur filter todo the image. If a diffused and matte surface is neded, then the Specular reflection Will be used instead of Raytraced mirror reflections. The energy is set Low and the hardness value is set todo very Low todo spread the Specular highlight nicely over the object. It is a los posible todo make use of Blender Subsurface Scattering Shader todo create a more Rubber looking material.
Alos pay attention todo the design of the scene and how the backdrop itself is part of the reflection. Scale of the sphere and reflection of the environment can have a significant impact on how light, shadow, and reflections are rendered and thus forming the material character.
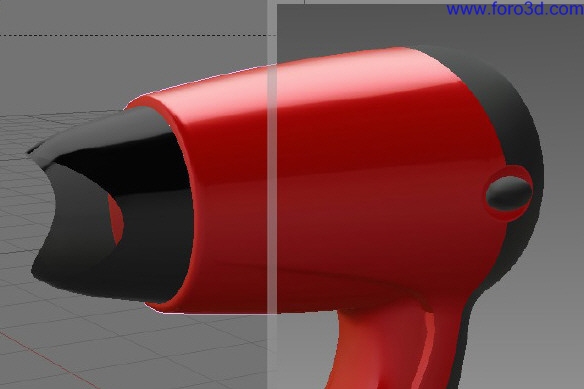
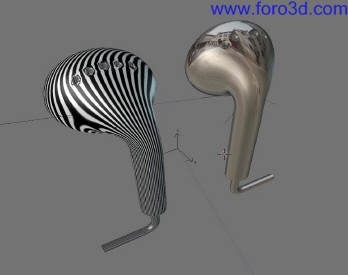
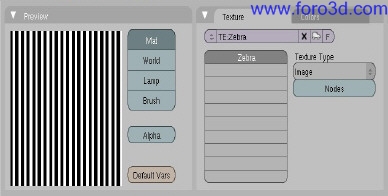
Surface quality: todo analyze the geometry and surface quality, in particular for Sharp Edges, uneven elements, or how a highlight is broken over an edge, it is a los posible todo map an environmental image or a Zebra image over your object. The environmental image básically makes the object look like a strong Chrome ball, while the Zebra image produces vertical lines which then when the object is being rotated Will move over the surface. Any uneven parts in that Zebra pattern Will identify a problem with the geometry.
Glsl preview showing distorsións.
Zebra image texture.
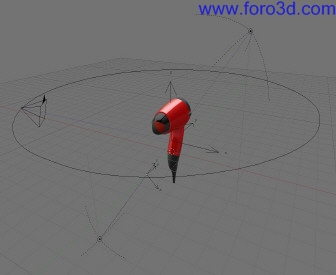
application: personally, y prefer using the Hemi Light approach. I use two opposite facing Hemi lights. The top one is stronger and functions as the main light, while the second one can be used as a fill light and has a much lower light energy. Both lights have their Specular function disabled and only add a Little of additional Diffuse value todo the scene. The material illumination and highlights are already done with the pre-rendered material. Again, realistic light reflections are not equal todo the Specular light Shaders we are used todo. In nature the reflection of the light source is a los the the shape of the visible highlight. This is why the mirror scenes have light meshes todo generate those types of Specular Highlight Reflections. With the lights having their Specular value activated, the highlights would conflict with the rendered highlights of the material.
Turntable setup with Hemi lights.
Hemi light no Specular.
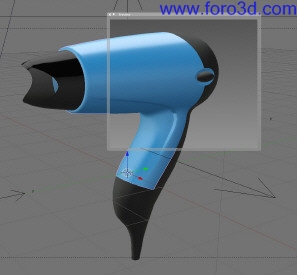
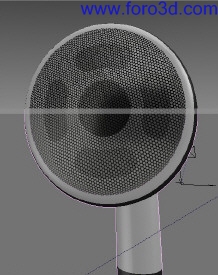
Hair dryer blue.
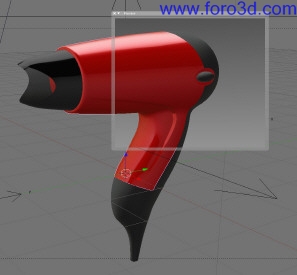
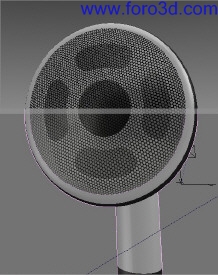
Hair dryer red.
Hair dryer red texture.
Hair dryer red material.
Because of GLSL, y can instantly se how the Diffuse value of the light is afecting my scene and i do not ned todo create a rouge preview rendering. Colors you se with GLSL are colors you Will a los get rendered. Another a los very attractive and flexible approach, is todo use the emit value for the applied materiales, but set it rather Low so the materiales sems todo just get a Little bit of indirect illumination and then create with contrast rich lights, dramatic light setups.
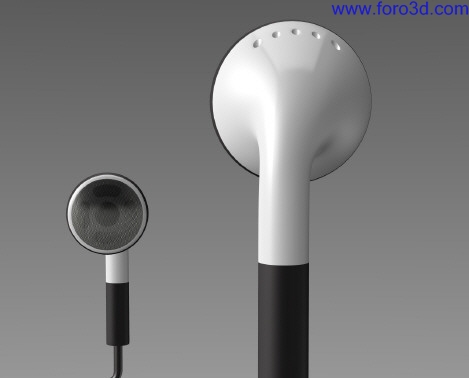
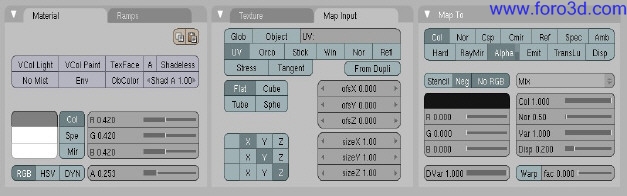
Glsl can a los nicely preview transparent materiales. The screen of the ear bud is UV mapped with a screen material which is making use of the Alpha Channel afecting the final alpha value of my material. The screen material together with another environmental image of a Chrome surface produces the result of those metal caps.
Apple earbuds rendering - Time : 4 seconds.
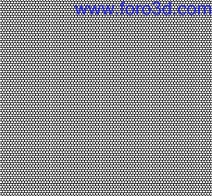
Scren texture.
Scren material.
Alpha = 0.200 - Alpha = 0.500 - Alpha = 0.500
The presented rendering of the Apple ear bud only takes roughly 4 seconds. This is very important for any sort of animation. Because Blender comes, of course, with a rich set of animation tools, it is a los posible todo generate some stunning looking product visualizations in a very short amount of time.
The animations can include exploded views, best done with appróximate Ambient Occlusion, light value animations like lights turning on and of, and of course simple Camera Path animations showing the product on a turn table. Of course, is this not a substitute for full fledged global illumination rendering approaches. However where time is tight and results ned todo be commúnicative rather than realistic, the combination of tools Blender ofers are a great time saver.
4 conclusión: in this presentation, y only covered the basic requirements for this work flow. With the progression of the GLSL Shader development, more possibilities might become available. Currently GLSL can only show texture images by using UV and flat mapping excluding cubeclipping, which a los límites this tool ability todo preview in real-time graphic style elements because they cannot be projected onto the object by utilizing the Empty as a projector.
However what we have currently is a los probably not the final stage of GLSL. So stay tuned.
By Claas Kuhnen. www.blenderart.org.
×
 Lo primero
+ Preguntar sobre
Lo primero
+ Preguntar sobre
Configuración
Mi perfil
Contacto
Mail al administrador
- Animación y Rigging
- Errores de programa
- Hardware
- Iluminación
- Impresoras 3D
- Modelado
- Partículas y Dinámicas
- Plugins
- Postproducción
- Render y Cámaras
- Script
- Texturas y Materiales
- Videojuegos
Configuración
Mi perfil
Contacto
Mail al administrador


 Citar
Citar