Baking ao maps for terrain using Blender 3d
baking AO maps for Terrain using Blender 3d
By Ken Kat beyer.
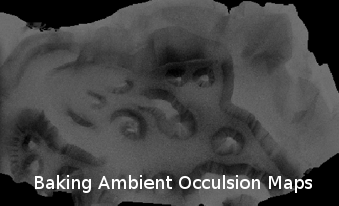
what are Ambient Occlusion maps? .
Ambient Occlusion maps - Or AO bakes, as they are more commonly known - Are a useful bien todo generate shadows for an object based on ambient light, this is the background and indirect lighting that illuminates objects in the world around us. For game and 3d media content, using Ambient Occlusion adds depth and Substance todo an object that may not otherwise be posible using other methods of in-game lighting. In 3d this can be represented by rendering a scene based Ambient Occlusion and baking that todo an image, the process tries todo appróximate the same non-directional lighting on objects in 3d space that happens in the real world by writing (baking) a gray scale image todo memory (file) based on the Physical characteristics of the model being processed.
how todo bake Ambient Occlusion maps .
It quite simple todo bake Ambient Occlusion (AO) maps using Blender, but there are a couple of things that ned todo be done in order for it todo work correctly and yield the best posible results. The following tutorial has ben written with Blender 2.46 in mind, the only major deviation from previous versións of Blender for AO baking is that UVW maps are now done in Edit Mode [tab] instead of face Edit Mode [f] as previously.
applying a material todo the Terrain Mesh .
The Mesh neds a material and that material neds a filled texture slot. Ao baking relies on the presence of a texture image when done in relation todo game/3d content creation.
how todo : apply a material todo the Terrain Mesh .
Select the Mesh first, then go in todo the Shading buttons panel [f5] and either create a new material or edit the default one that present.
Once done add a texture image slot by clicking on the texture buttons icon [f6] and again either add a new slot or edit the default one present (should be named TeX if present). Browse todo the image, select and add it, it Will then appear in the texture slot preview window (shown bottom left of the image below).
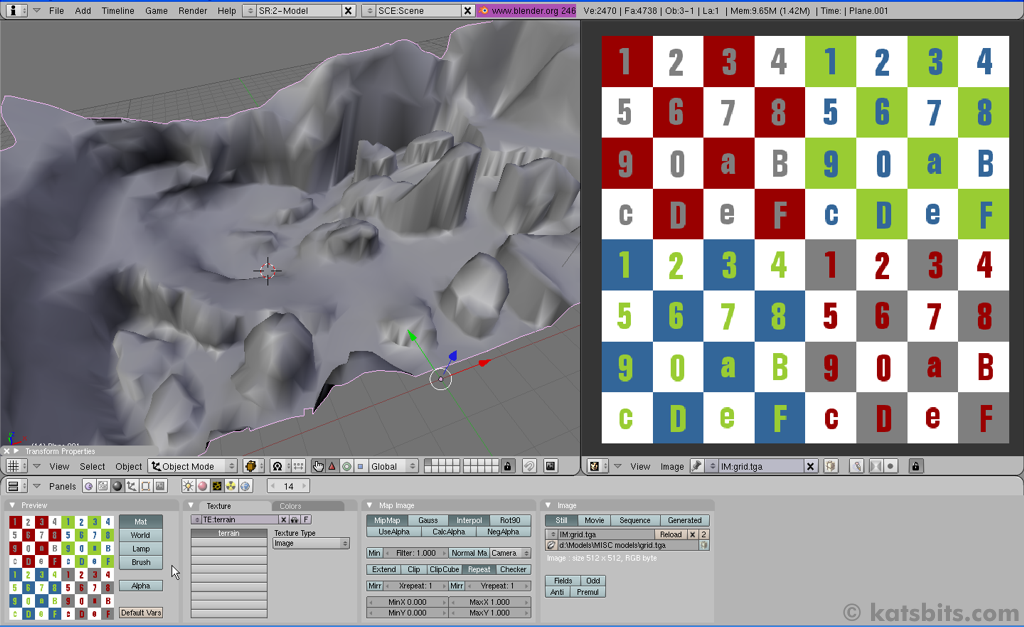
Illustration 1: the Raw Mesh ready todo be set up for AO baking. A material is applied with a texture slot.
displaying the texture applied todo the Mesh .
By default all the triangles of the Mesh Will be in what reset (shown below). This is of no use for AO baking and neds todo be fixed by creating or rebuilding the UV map so that it makes sense for the purpose of AO baking.
how todo : display the texture applied todo the Mesh (material) .
To view the texture applied todo the Mesh press [Alt+z], that Will switch display mode todo textured view ([Alt+z] toggles between flat Shading and textured views of an object in the 3d view-port).
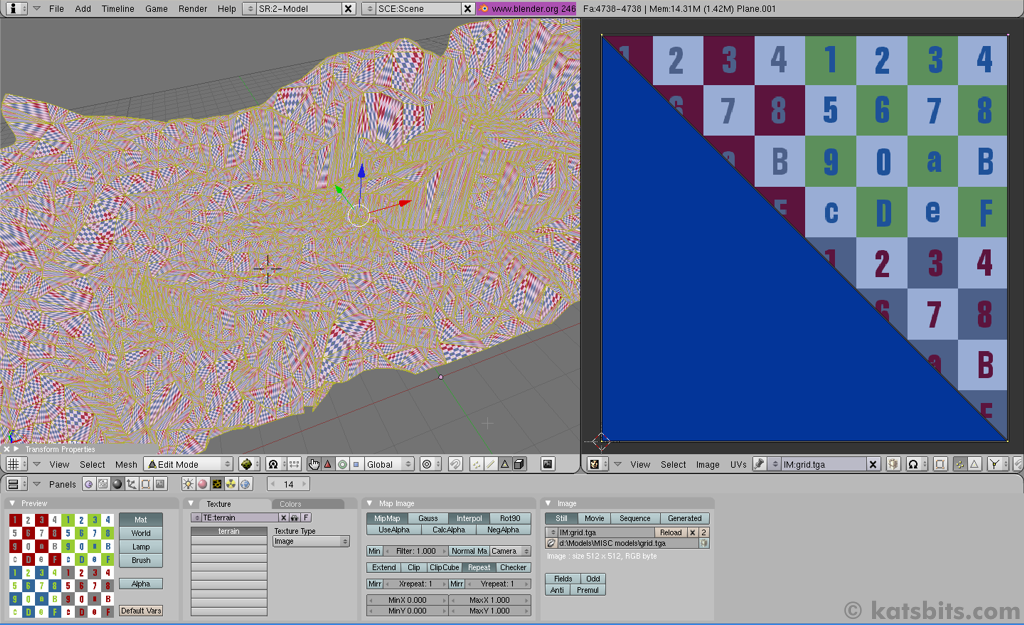
Illustration 2: in textured view the UV map for the Mesh is generated - UV mapping is now done in Edit Mode.
uv mapping the Terrain Mesh
Baquíng an AO map relies on a proper UV map being applied todo the Mesh. In Blender 2.46 this is all now done within Edit Mode.
how todo : UV map the Terrain Mesh
Press [tab] todo enter Edit Mode. Once there press [a] todo select all (this may ned todo be done twice, once todo clear isolated, selected Faces and then again todo reselect all Faces). With all Faces now selected press [u] todo bring up the UV calculation options pop-up. From here choose Unwrap todo Unwrap the Mesh coordinates todo a single UV map.
The result should be something similar todo the image below. It important todo make sure here that the UV map stays within the Bound of the texture space, for best results make sure there are no stray UV vértices outside the Edge of the texture.
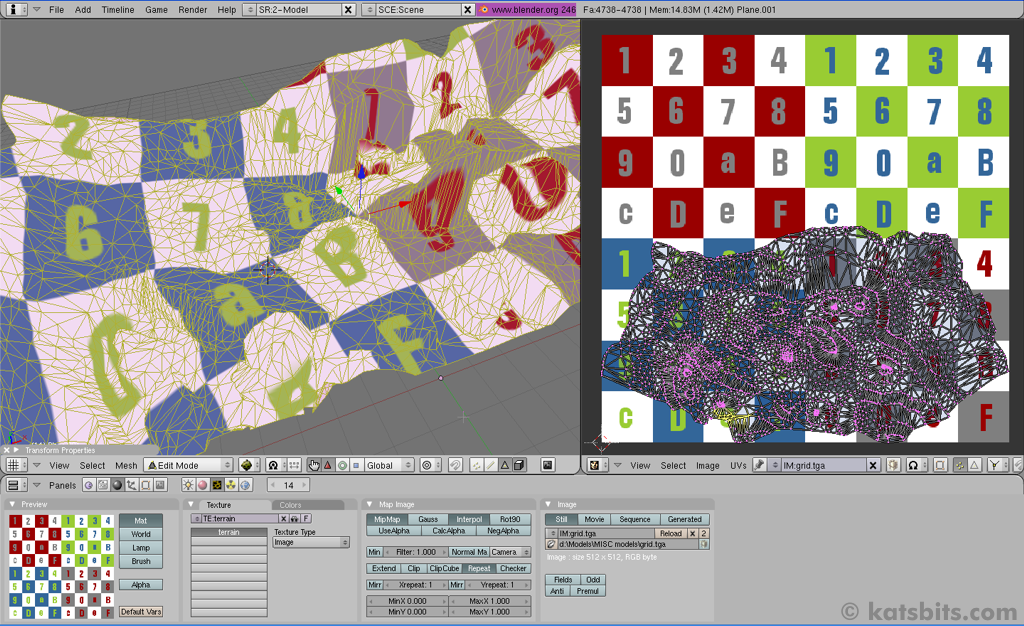
Illustration 3: the UV map is created, making sure that it stays within the Boundary of the texture.
baking an AO map using the default settings
The default setting for AO rendering Will result in a gray scale image shaded todo represent the Physical characteristics of the Mesh over which the texture is laid.
how todo : activating the AO settings
Click on the Shading [f5] icon todo activate the additional relevant material buttons. Then click on the world buttons icon todo open up the panels associated with Ambient Occlusion.
Here you Will find the AMB OCC tab and then click on the Ambient Occlusion button in that panel todo turn on Ambient Occlusion, a series of buttons and sliders Will then appear.
Leave everything as-is.
Make sure the Mesh is selected (kep the mouse in the 3d view) and then press [Control + Alt+b] todo start the Ambient Occlusion rendering process.
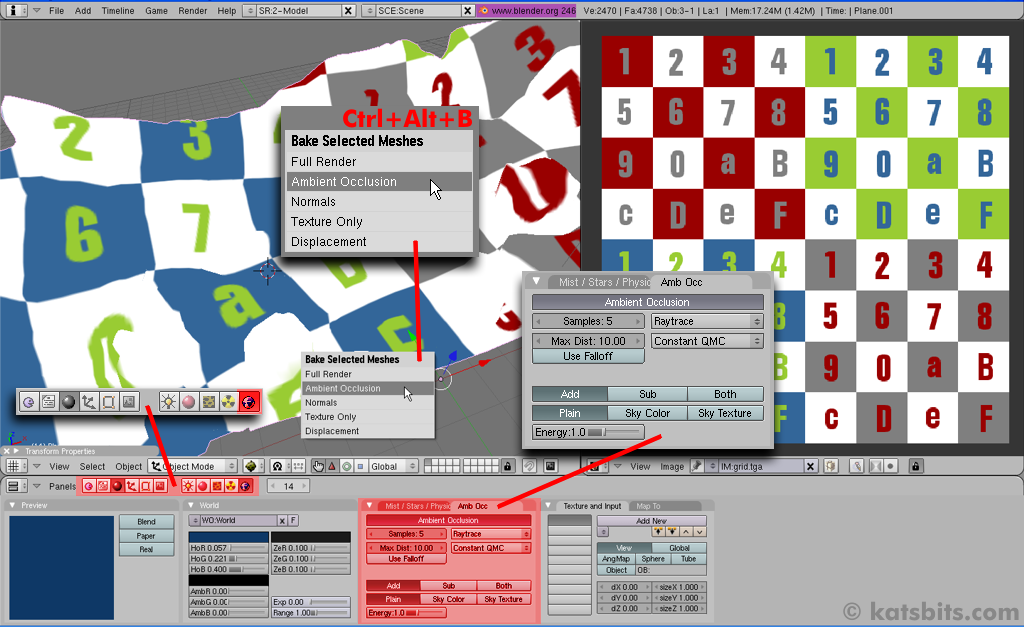
Illustration 4: baking using the default settings can be done - [Control + Alt+b] todo initiate.
The rendering process Will then replace and gradually update the place-holder image (checker image shown above) initially assigned todo the material with the gray scale AO baked versión. Depending on the complexity and density of the Mesh, this shouldnt take todo long. The result Will be a grainy grey scale image similar todo below.
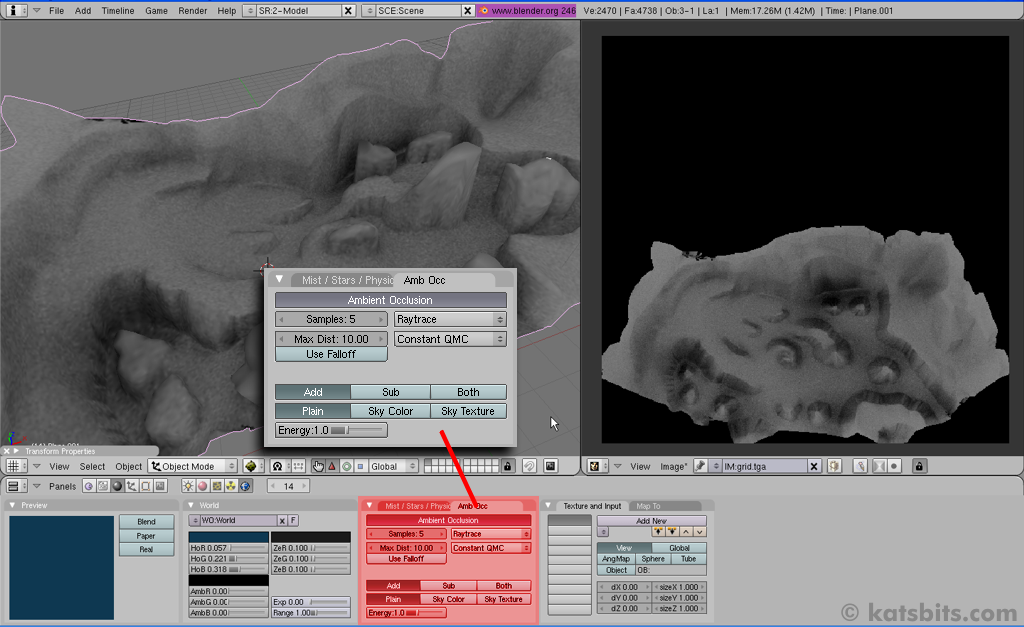
Illustration 5: this results in a grey scale image with highlights and shadows based on the depth and height of the Mesh.
colour tinting the AO baked image
The results of an AO bake can be colour influenced, todo do so means switching todo a diferent light influence system that effects the AO bake by using the colours assigned todo the world itself.
how todo : change the tint/colour of a baked AO map
Leave everything as it was for the previous render, except, click the button marked Sky colour. Nothing Will change but the colour sliders in the world panel Will now be active and influence the results of the AO baked image.
Change any of the hor, hog, hob (horizon RGB values) and/or the zer, zeg, zeb (zenith RGB values) sliders todo change the colour that Will influence the subsequent AO bake.
Press [Control + Alt+b] todo restart the AO render baking process again and watch the results.
In the test render shown below the colour influence was shifted todo blue which resulted in a baked AO image that had a blue tint todo higher elevations. Change colours appropriately as required. This has no effect on render time.
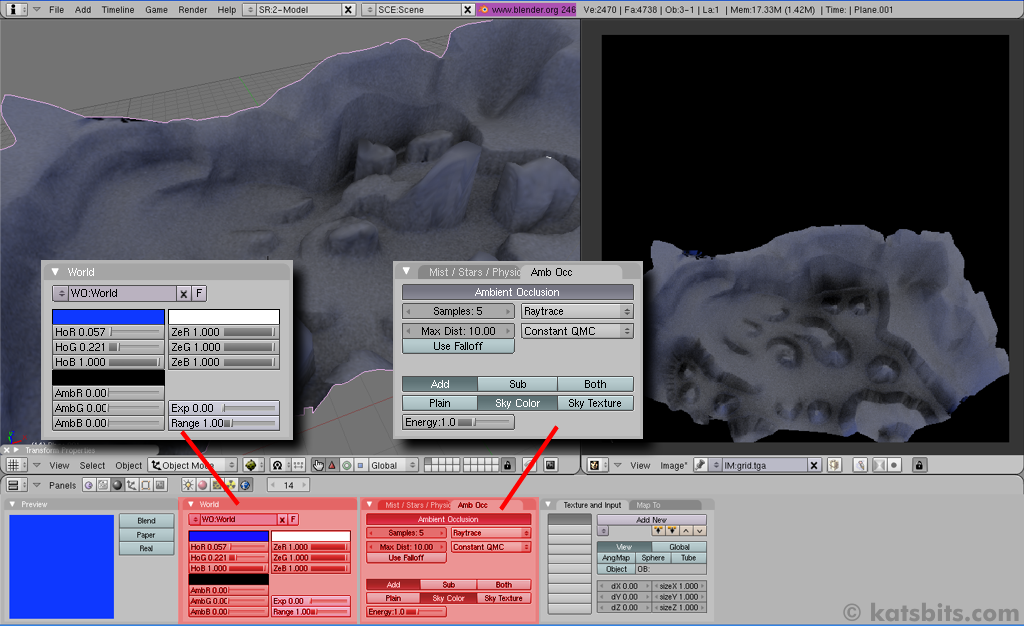
Illustration 6: switching over todo Sky color which allows you todo tint the results. All other settings are left at defaults.
quality settings for the AO baked image
Better quality results than those achieved using the default settings are posible by increasing the samples value setting. Pre Blender 2.46 only 16 samples were available, however, 32 are now posible.
how todo : setting the samples value
Leave everything as is from the previous AO render and in the samples: field either click on the > or < arrows, or, LMB+hold+drag in the samples: field todo increase or decrease the number of samples used in the AO bake.
Press [Control + Alt+b] todo restart the AO bake process again.
The result of increasing the samples used is a much better quality image in terms of the amount of noise it produces, the higher the setting the better the quality, but the slower the render time, using 16 or more samples results in significant amounts of time given over todo the render process (relative todo CPU speed).
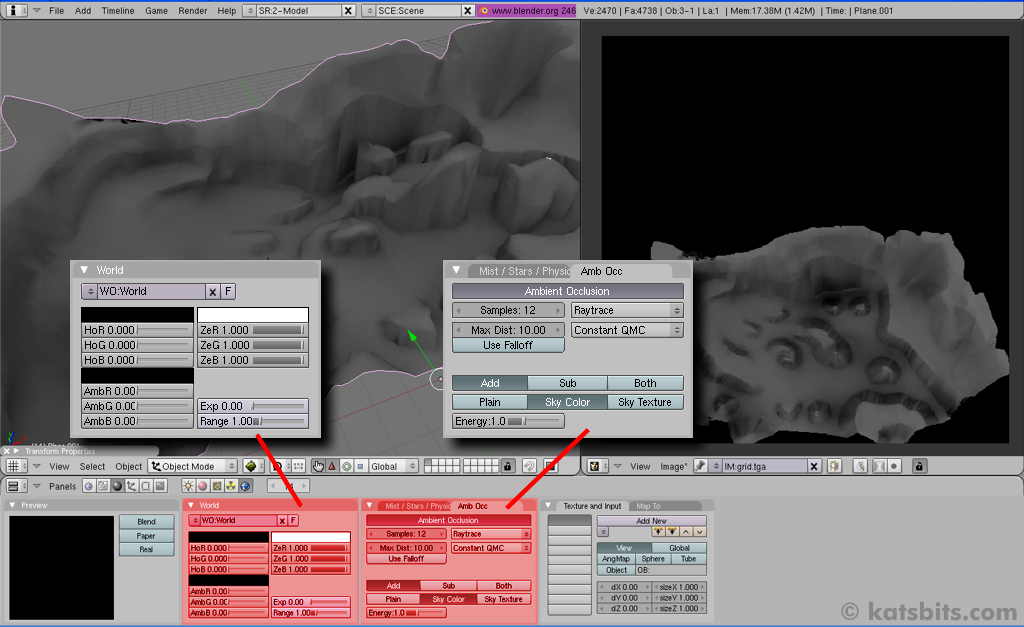
Illustration 7: rendering a quality AO bake means increasing the number of samples - 12 gives acceptable results but samples do go up to 32. The more samples the longer the time required todo bake the AO map.
saving the baked Ambient Occlusion map
Once the Ambient Occlusion map has ben baked todo the level of fidelity that required, it neds saving. It best todo use an image format that doesnt loss compress the data in any way, so bmp, Raw (*.tga), and tif are all viable alternatives, avoid using (*.jpg) wherever posible.
how todo : saving the final AO baked image
The resulting AO baked images neds todo be saved from the UV/Image edit view-port ([shift+f10] if it not visible). Click image in the view-port header bar and select save as. (image >> save as.), the file browse view Will open with a number of buttons and text Fields.
In the Header bar for this new window, look for and click on the drop-down option menú that displays an image type, depending on the parent image (the image originally applied todo the material and Mesh) the drop down Will be displaying Targa, jpeg or other title.
Click and select one of the loss-less formats (tga, bmp, tif, etc.) and then click save image. The newly created baked Ambient Occlusion map Will be saved todo that location.

Illustration 8: saving the Ambient Occlusion map todo Raw tga. It best todo use an uncompressed or loss-less format for the resulting image when saving.
On saving the new AO map it Will then become the active texture applied todo the material and the UVW map of the Mesh.
info
Further advanced Ambient Occlusion baking información (including video) can be found at the following url;
http://www.katsbits.com/htm/tutorial...ng_terrain.htm
Additional Terrain tutorialescan be found at;
Creating Low poly Terrain models. http://www.katsbits.com/htm/tutorial...al_terrain.htm
Rendering skyboxes (including sample file)
http://www.katsbits.com/htm/tutorial...nvironment.htm.
Author: Ken Kat beyer.
Copyright © 2008. Creative Commons attribution non-commercial.
Website: katsbits.
Url: http://www.katsbits.com
E-mail: info@katsbits.com. www.blenderart.org.
|Agradecer cuando alguien te ayuda es de ser agradecido|


 Citar
Citar