

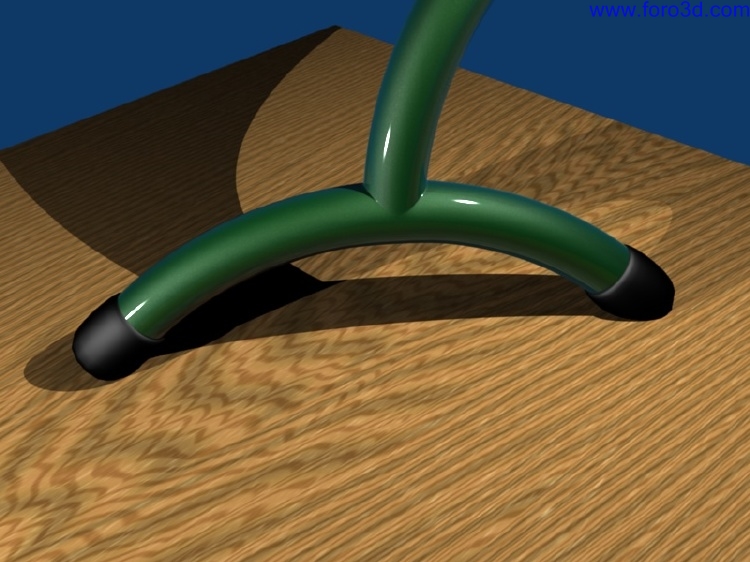
 How to create a weld joint
how todo create a weld Joint
By Andrew lane.
Introduction.
This effect could probably be achieved using booleanas, but the method explained here is a god practice.
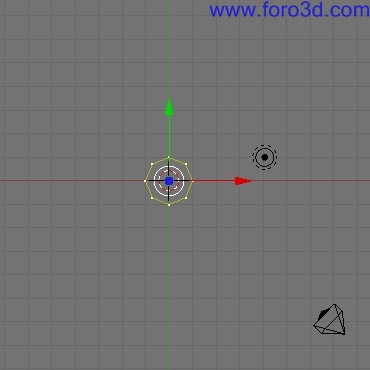
We Will start of by creating a circle. Using the space bar tool menú: Mesh-circle. Create it with eight vértices (just for speed of editing later on). We now have a circle centered on the cursor [fig.
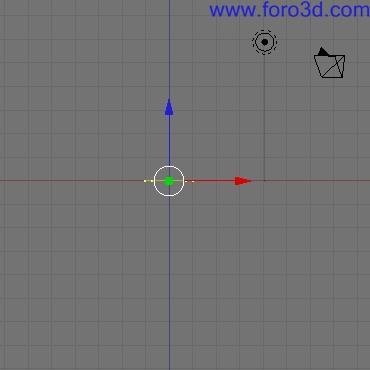
Now click the 3d window todo the right of the circle todo sepárate the cursor from the circle [fig.
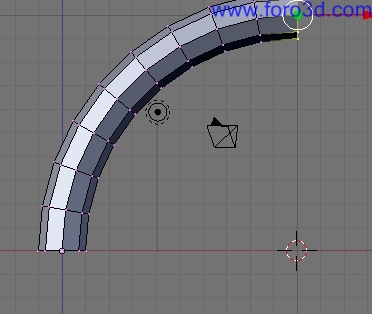
Make sure [Num Lock] is on for this tutorial, then press [Numpad todo get this [fig.
Our view point has changed todo the side view. Go todo the editing window [f and in the Mesh tools section press spin. We have made a curve based on the shape of the circle [fig.
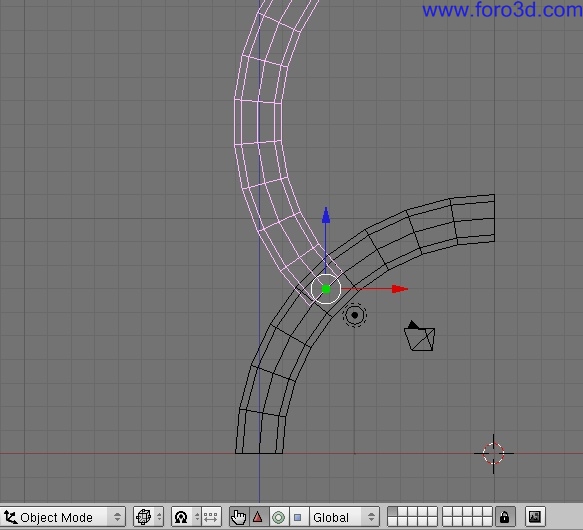
By changing the degr spinner value (below the spin button) todo a negative we get a curve in the opposite direction. Press [tab] todo exit Edit Mode. This is the shape we Will work with. Duplicate it once: while in object mode [tab], press [Control d] right click todo confirm the copy. Rotate the new copy th rouge 45 Degrees in the y axis and reposition it [fig . One shape penetrates the other about half way. This an artistic tutorial not a super scientific technical one, so dont worry about precisión. Save your file regularly if you wish. I have pressed [ todo reach wireframe mode for these screenshots, if you are new todo Blender.
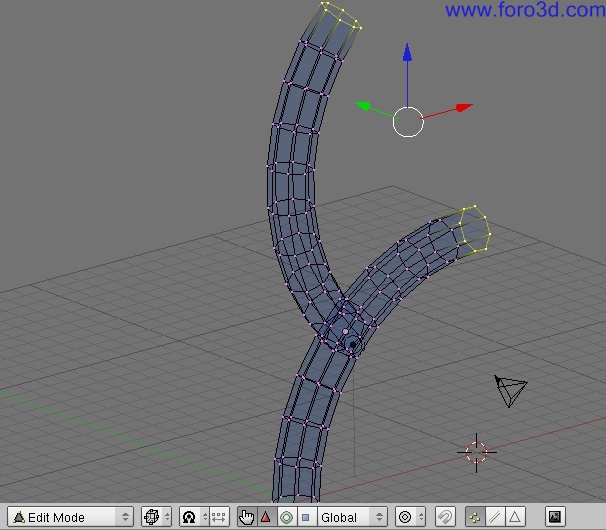
Select one of the tuve shapes, hold [shift] then select the other by right clicking it. Pressing [Control j] Will join the shapes into one editable Mesh. Pressing [tab] Will reveal the new Mesh [fig.
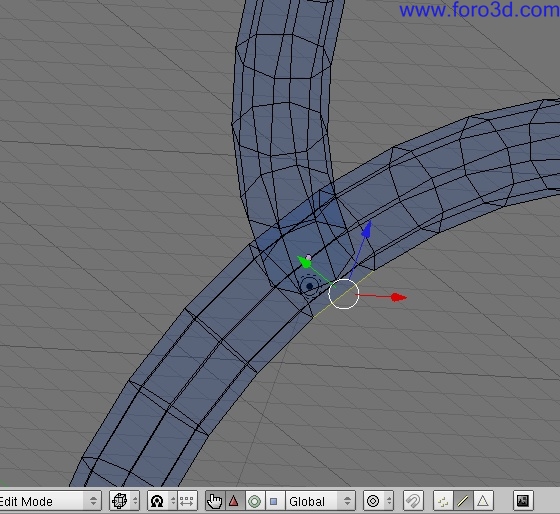
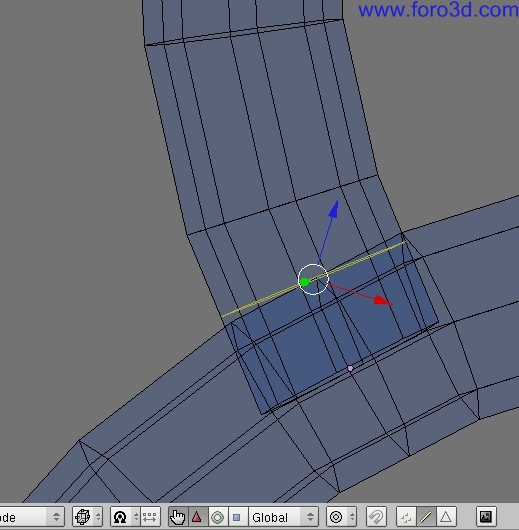
Enter Edge select mode [Control tab and make some cuts in the Mesh just todo refine it. Right click this Edge [fig then press [Crtl r]. Now, left click twice todo make the Cut [fig.
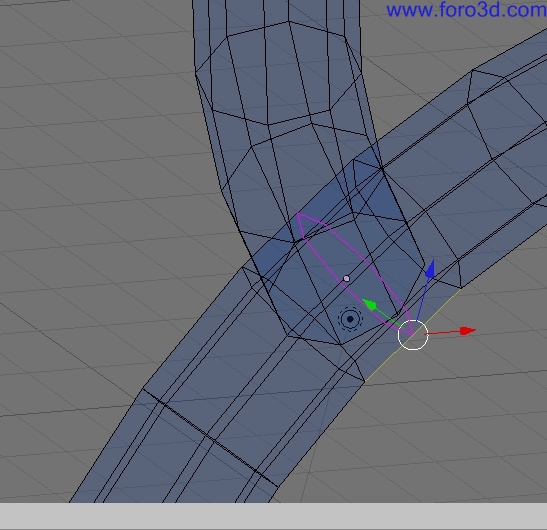
shows me making another Cut where the two objects met. We ned todo create two vértices at each point where the surfaces met, so your cuts may ned todo be in slightly diferent positions from mine. You ned todo make about 4-6 more cuts in the Mesh todo get enough vértices todo merge/weld together [fig 8 y.
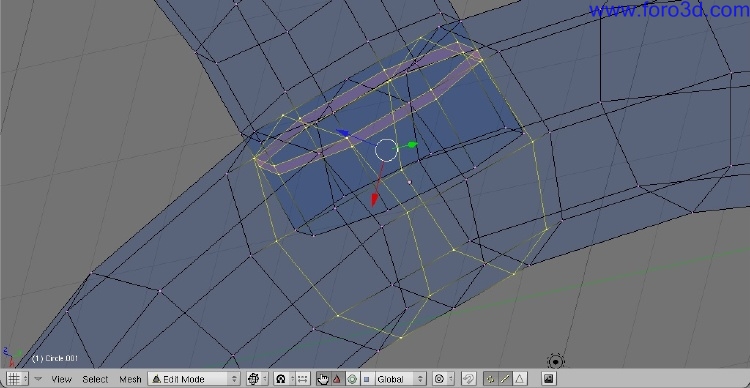
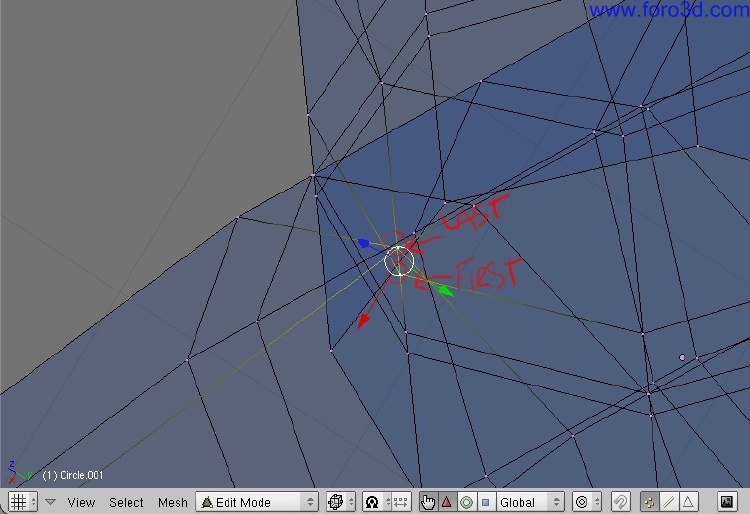
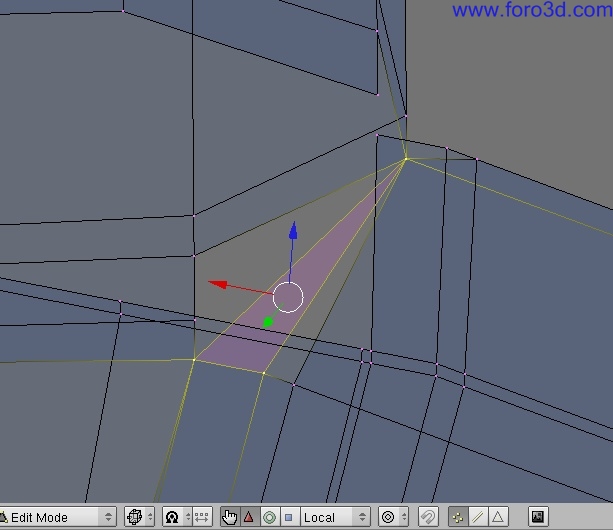
Now we ned todo weld. Enter vertex mode [Control tab . Select two vértices that are close todo each other, one from each tuve shape. Select from the vertical tuve first, then the horizontal tuve [fig 1.
Press [w] then select merge from the list. Repeat this process at the Boundary of the tuve shapes where the vértices met up. Select vértices in the same first todo last order so the surfaces dont Warp. If pairs of vértices dont match up, Perform more cuts [fig 1.
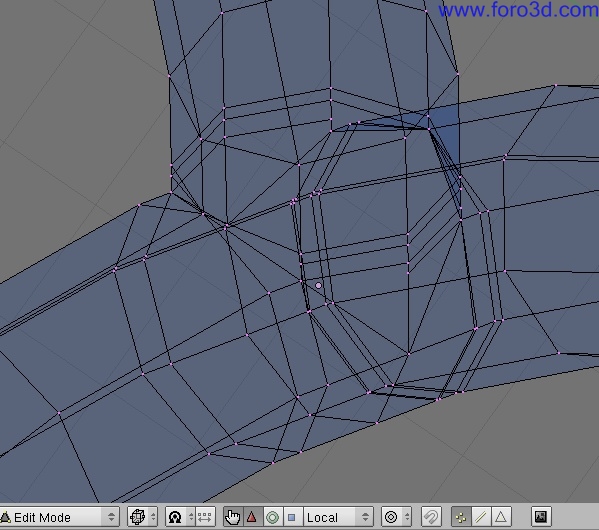
Go into face select mode [Control tab, and select the Faces of the Mesh that are covered or part covered by other Faces [fig 1.
Pressing [x] Will bring up the erase menú, select Faces. This should make quite a mess of the Mesh (try saying that After a few pints) [fig 1.
Once again, go bak todo vertex mode and begin todo repair your Mesh by selecting 3-4 connected vértices and hitting [f] todo create a face [fig 1.
Repeat until all is well again [fig 1.
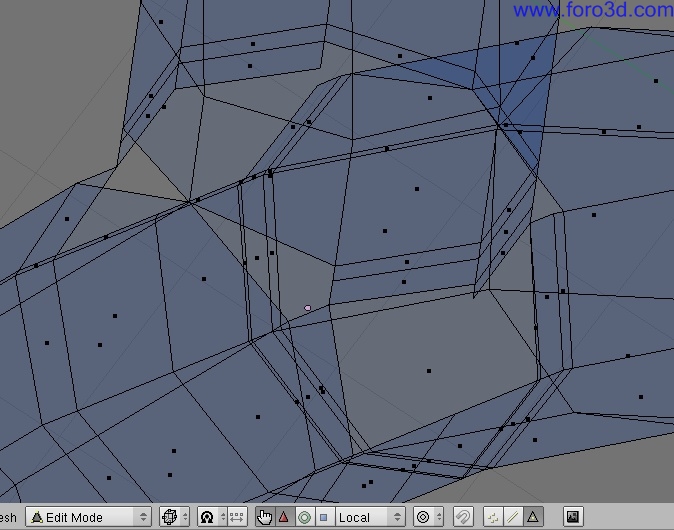
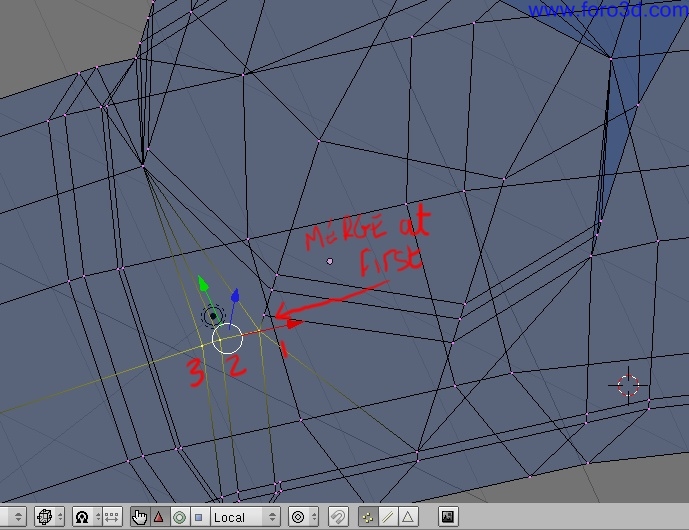
Now i Will merge these 3 vértices [fig 1.
Deleting vértices created during the cutting stage until we have [fig 1.
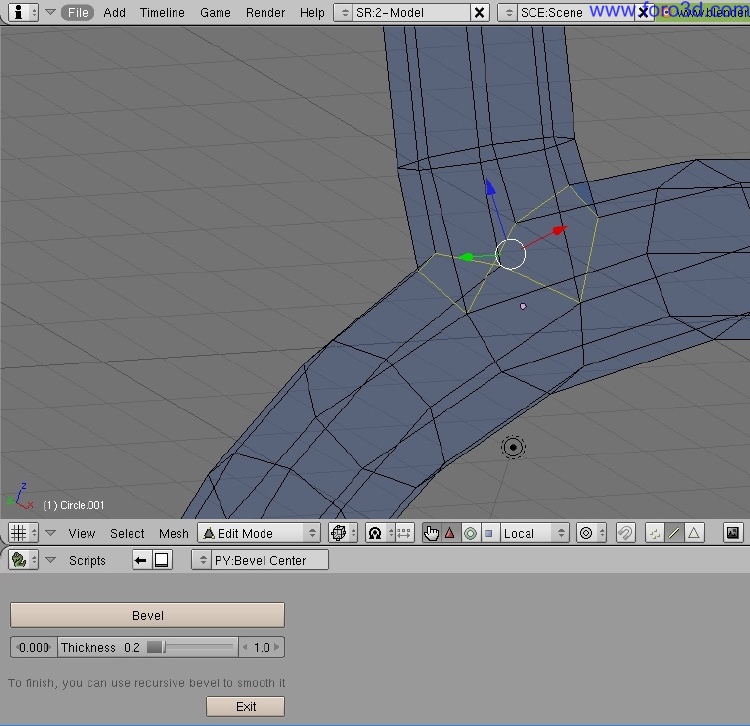
Select these Edges [fig 1.
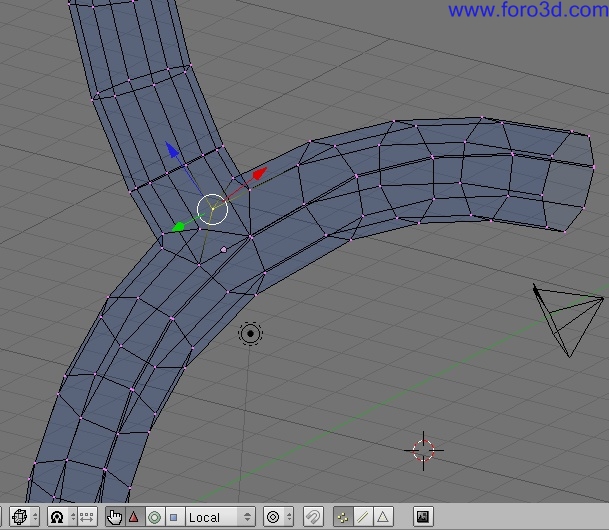
Then enter the script menú. Select scripts- >Mesh->bevel center. Press the large bevel button todo create a weld seam of the selected Edges [fig 1, which could be UV mapped later.
I hope those who have never used the 3d cursor for modeling before Will be exited by its potential for creating arcs and curves as the basis for more complex shapes. I Will write another article along these lines in the future, gracias for reading.
www.blenderart.org.
×
 Lo primero
+ Preguntar sobre
Lo primero
+ Preguntar sobre
Configuración
Mi perfil
Contacto
Mail al administrador
- Animación y Rigging
- Errores de programa
- Hardware
- Iluminación
- Impresoras 3D
- Modelado
- Partículas y Dinámicas
- Plugins
- Postproducción
- Render y Cámaras
- Script
- Texturas y Materiales
- Videojuegos
Configuración
Mi perfil
Contacto
Mail al administrador


 Citar
Citar
